
This gallery contains 51 photos.
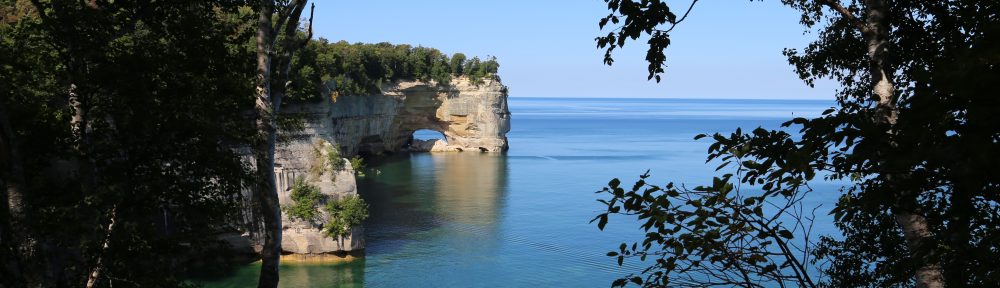
Pictured Rock National Lakeshore: Photo gallery highlights from our 42.4 mile backpacking journey across Pictured Rocks National Lakeshore, Michigan, September 9th through 14th, 2018. Continue reading
This gallery contains 51 photos.
Pictured Rock National Lakeshore: Photo gallery highlights from our 42.4 mile backpacking journey across Pictured Rocks National Lakeshore, Michigan, September 9th through 14th, 2018. Continue reading
Arches National Park is a treasure trove of incredible landscapes and amazing geological features. According to the National Park Service website, “the park has over 2,000 natural stone arches, in addition to hundreds of soaring pinnacles, massive fins and giant balanced rocks.” The Devils Garden Trail includes all of this and offers the most challenging hike in the park, even for a seasoned hiker.
Arches is not considered a backcountry park, other than a few outlying areas accessible only in a high clearance vehicle, but this trail is your best chance of getting away from the crowds, even if it is only for short periods of time. This is the longest trail in Arches National Park. The NPS brochure for this hike places the total distance at 7.2 miles, including all of the side trails to the various arches and the primitive trail. It also includes some reasonably challenging rock scrambles, several steep climbs/descents, and narrow sections of trail with significant drop offs. If you reach a point where you do not feel comfortable traversing the terrain, I recommend you turn around and return via the primary trail. We encountered a number of hikers who did just this on the day we were there.
For your own safety and the protection of the sensitive desert landscape, stay on the trails! The sandstone fins are an amazing feature in the Devils Garden landscape, but they also present some interesting challenges to navigation. Pay close attention to the cairns that mark the way, especially on the primitive portion of the loop. Generally, the cairns are not too difficult to find, but make sure you locate the next cairn before you proceed, and backtrack to the last marker you observed if you are unable to find your way forward
At one point on the primitive trail it is possible you will encounter a pool of water that you will need to cross depending on the season (it was waist deep when we visited in mid-May). You will either need to drop into and wade through the water or scramble over the steep rock to one side. We chose the rock scramble which proved quite a challenge. It could easily have resulted in a dip in the pool we were attempting to avoid, but we successfully navigated the obstacle and remained dry in the process.
If you plan to do the full loop, I recommend following the primary trail out to Double O Arch and Dark Angel first and returning via the Primitive Trail. This allows you to visit most of the major landscape features first, just in case you encounter a section of the trail where you are not comfortable proceeding due to difficult conditions or your own skill level.
Don’t forget to pack plenty of water and enjoy the hike!
The first two arches you will encounter are Tunnel Arch and Pine Tree Arch both of which are accessible down a side trail that adds 0.5 miles to the total hike. Even though this is a short and easy trail, I suggest visiting these arches on the outbound trip as you may be inclined to bypass them if you are too tired on the return trip.

Tunnel Arch

Pine Tree Arch
The next landmark you will encounter is Landscape Arch one of the best known arches in the park. Now at this point in the trail you will likely be thinking, “this is easy!” You may also be wondering if it is possible to escape the crowds, especially during busier times of the year. Not to worry, keep hiking because there is plenty of great scenery ahead, and the farther you go, the more likely you are to escape the crowd.

Landscape Arch
Just past Landscape arch you will encounter the first obstacle that will cause some to turn back…we witnessed this when one member of a party decided they would rather return to the trailhead than continue on. At this point on the trail this is a perfectly safe thing to do, even for an individual person. The scramble up the relatively steep face of this sandstone fin is not really that difficult; however, if you have a fear of falling or a poor sense of balance it can be rather intimidating.

Climbing a steep fin…the first major challenge
Shortly after reaching the top of this fin you will encounter a side trail that leads to Partition Arch and Navajo Arch. This trail adds an additional 0.8 miles to the hike and like the other side trails is worth the effort.

Partition Arch

Navajo Arch
On the next section of trail, you traverse the top of a narrow fin with a serious drop off on both sides. For anyone with a fear of heights this will be a challenging section of trail, but the views are worth it! Descending off the fin also takes a bit of strategy so keep an eye out for markers that indicate the way down, as it is not the easiest route to find.

Traversing the top of a narrow fin
A little further along you will encounter Double O Arch. The area under the arch was closed off when we visited due to a large chunk of rock breaking off and falling away from the arch a few weeks earlier during a period of significant rain…just part of the ever changing landscape.

Double O Arch
The next landmark to visit is Dark Angel, a towering pinnacle, that requires an out and back side trail of 0.8 miles round trip, though I highly recommend not skipping this as the sweeping views at the end of the trail are well worth it!
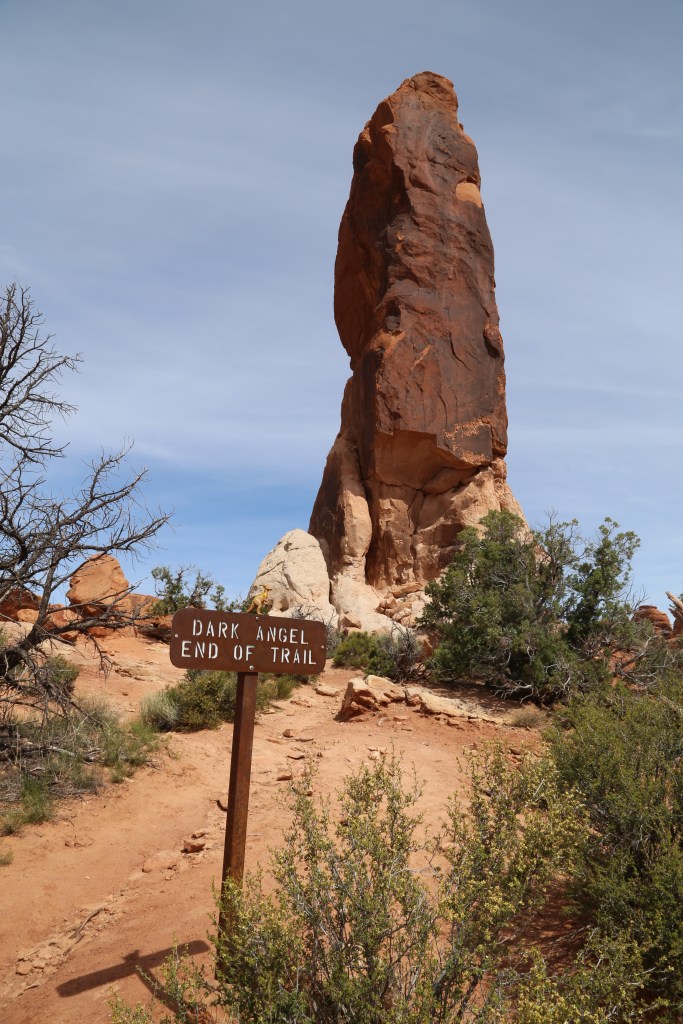
Dark Angel

The amazing view looking back from the end of the Dark Angel trail
After backtracking on the Dark Angel trail, you have the option to return to the trailhead via the primary trail by which you came, or you can complete the loop on the Primitive Trail. If you found the main trail was intimidating and pushed your limits, then I do not recommend taking the Primitive Trail. If you are up to the challenge the effort is worth it, and make sure you don’t miss the only side trail out to Private Arch.
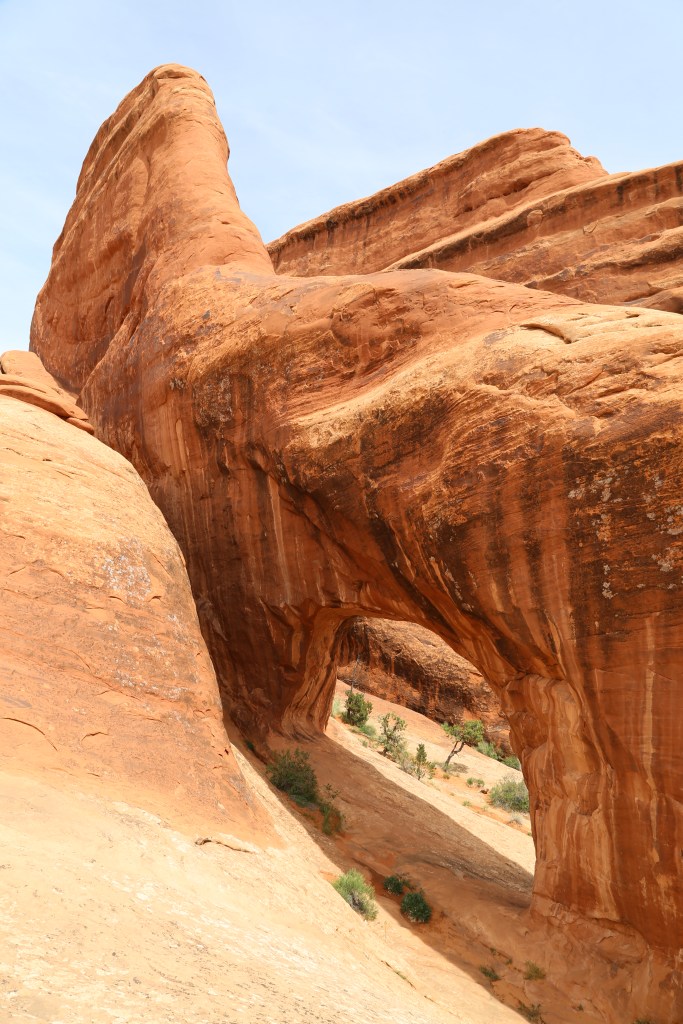
Private Arch
Even though you won’t completely escape the crowds, especially on the easier portions of the trail, this hike is a must do for any serious hiker visiting Arches National Park. You can hike nearly all of the shorter trails in the park in the span of a single day, but make sure you carve out at least half a day (more if you are a photography buff) to do the entire Devil’s Garden Trail, including the Primitive Trail if you are up for the challenge!

View from the back side of the Primitive Trail, looking up at the fin we crossed earlier in the hike…those are hikers up there!
© Todd D. Nystrom and Todd the Hiker, 2016.
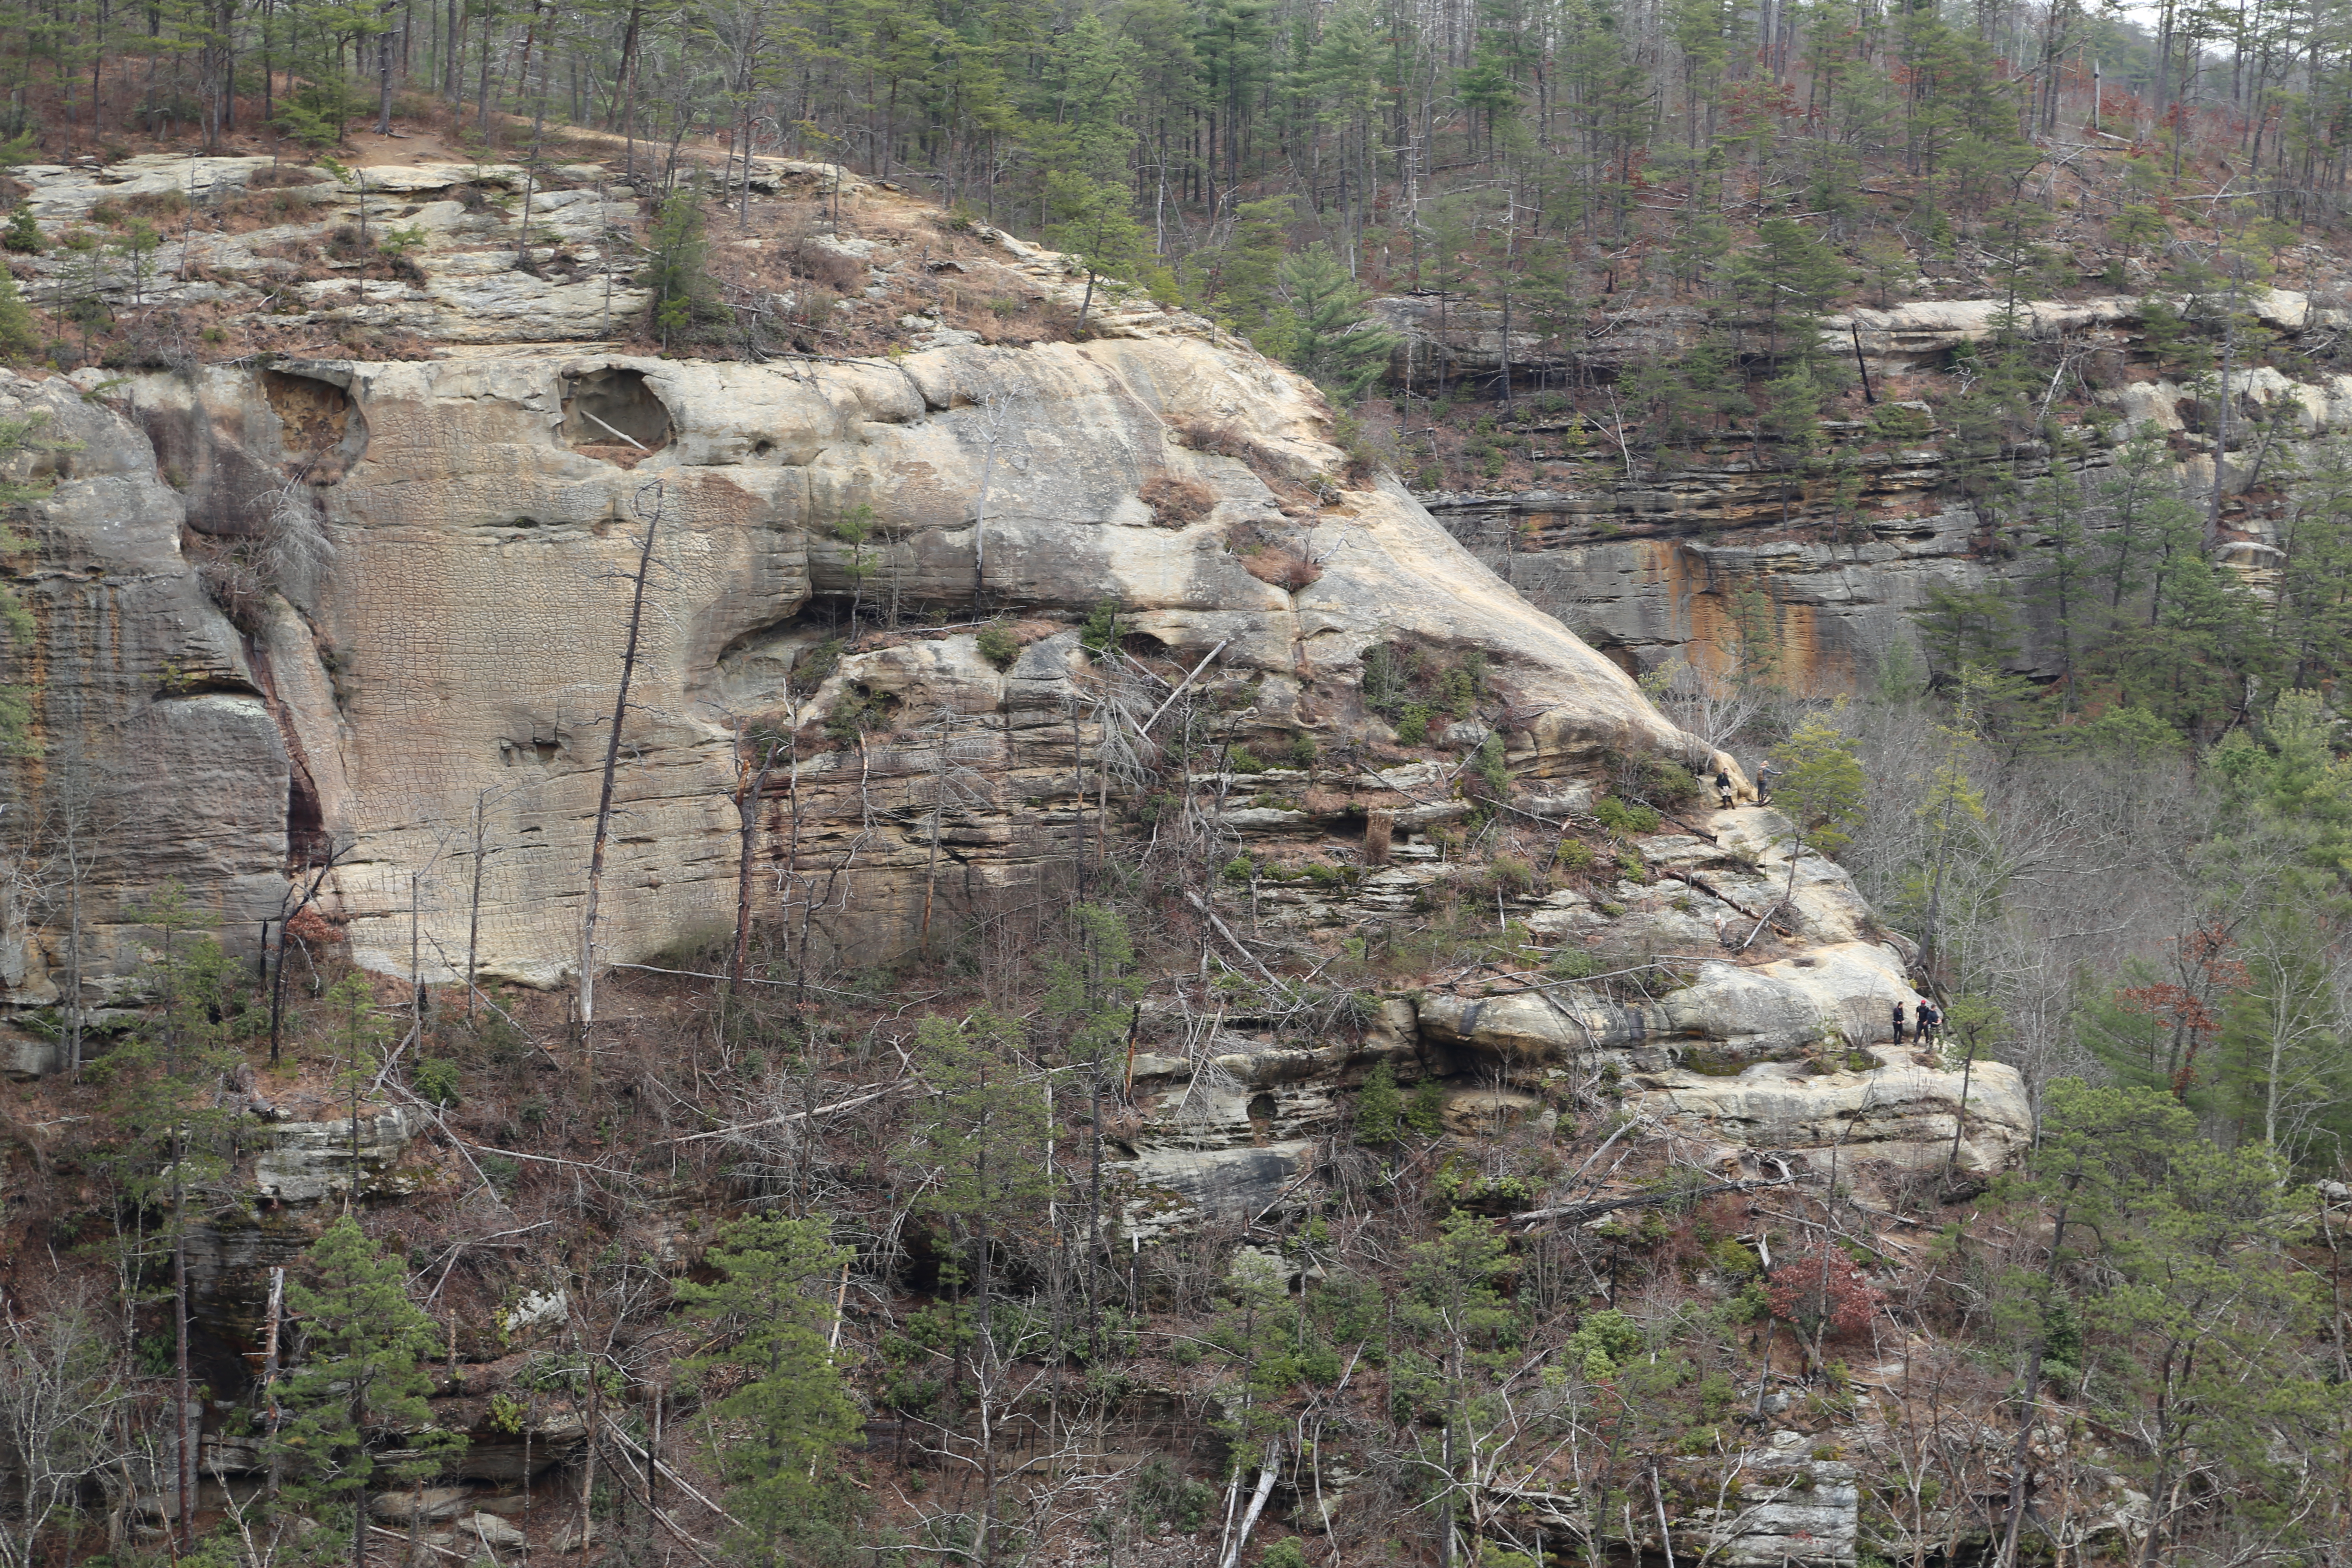
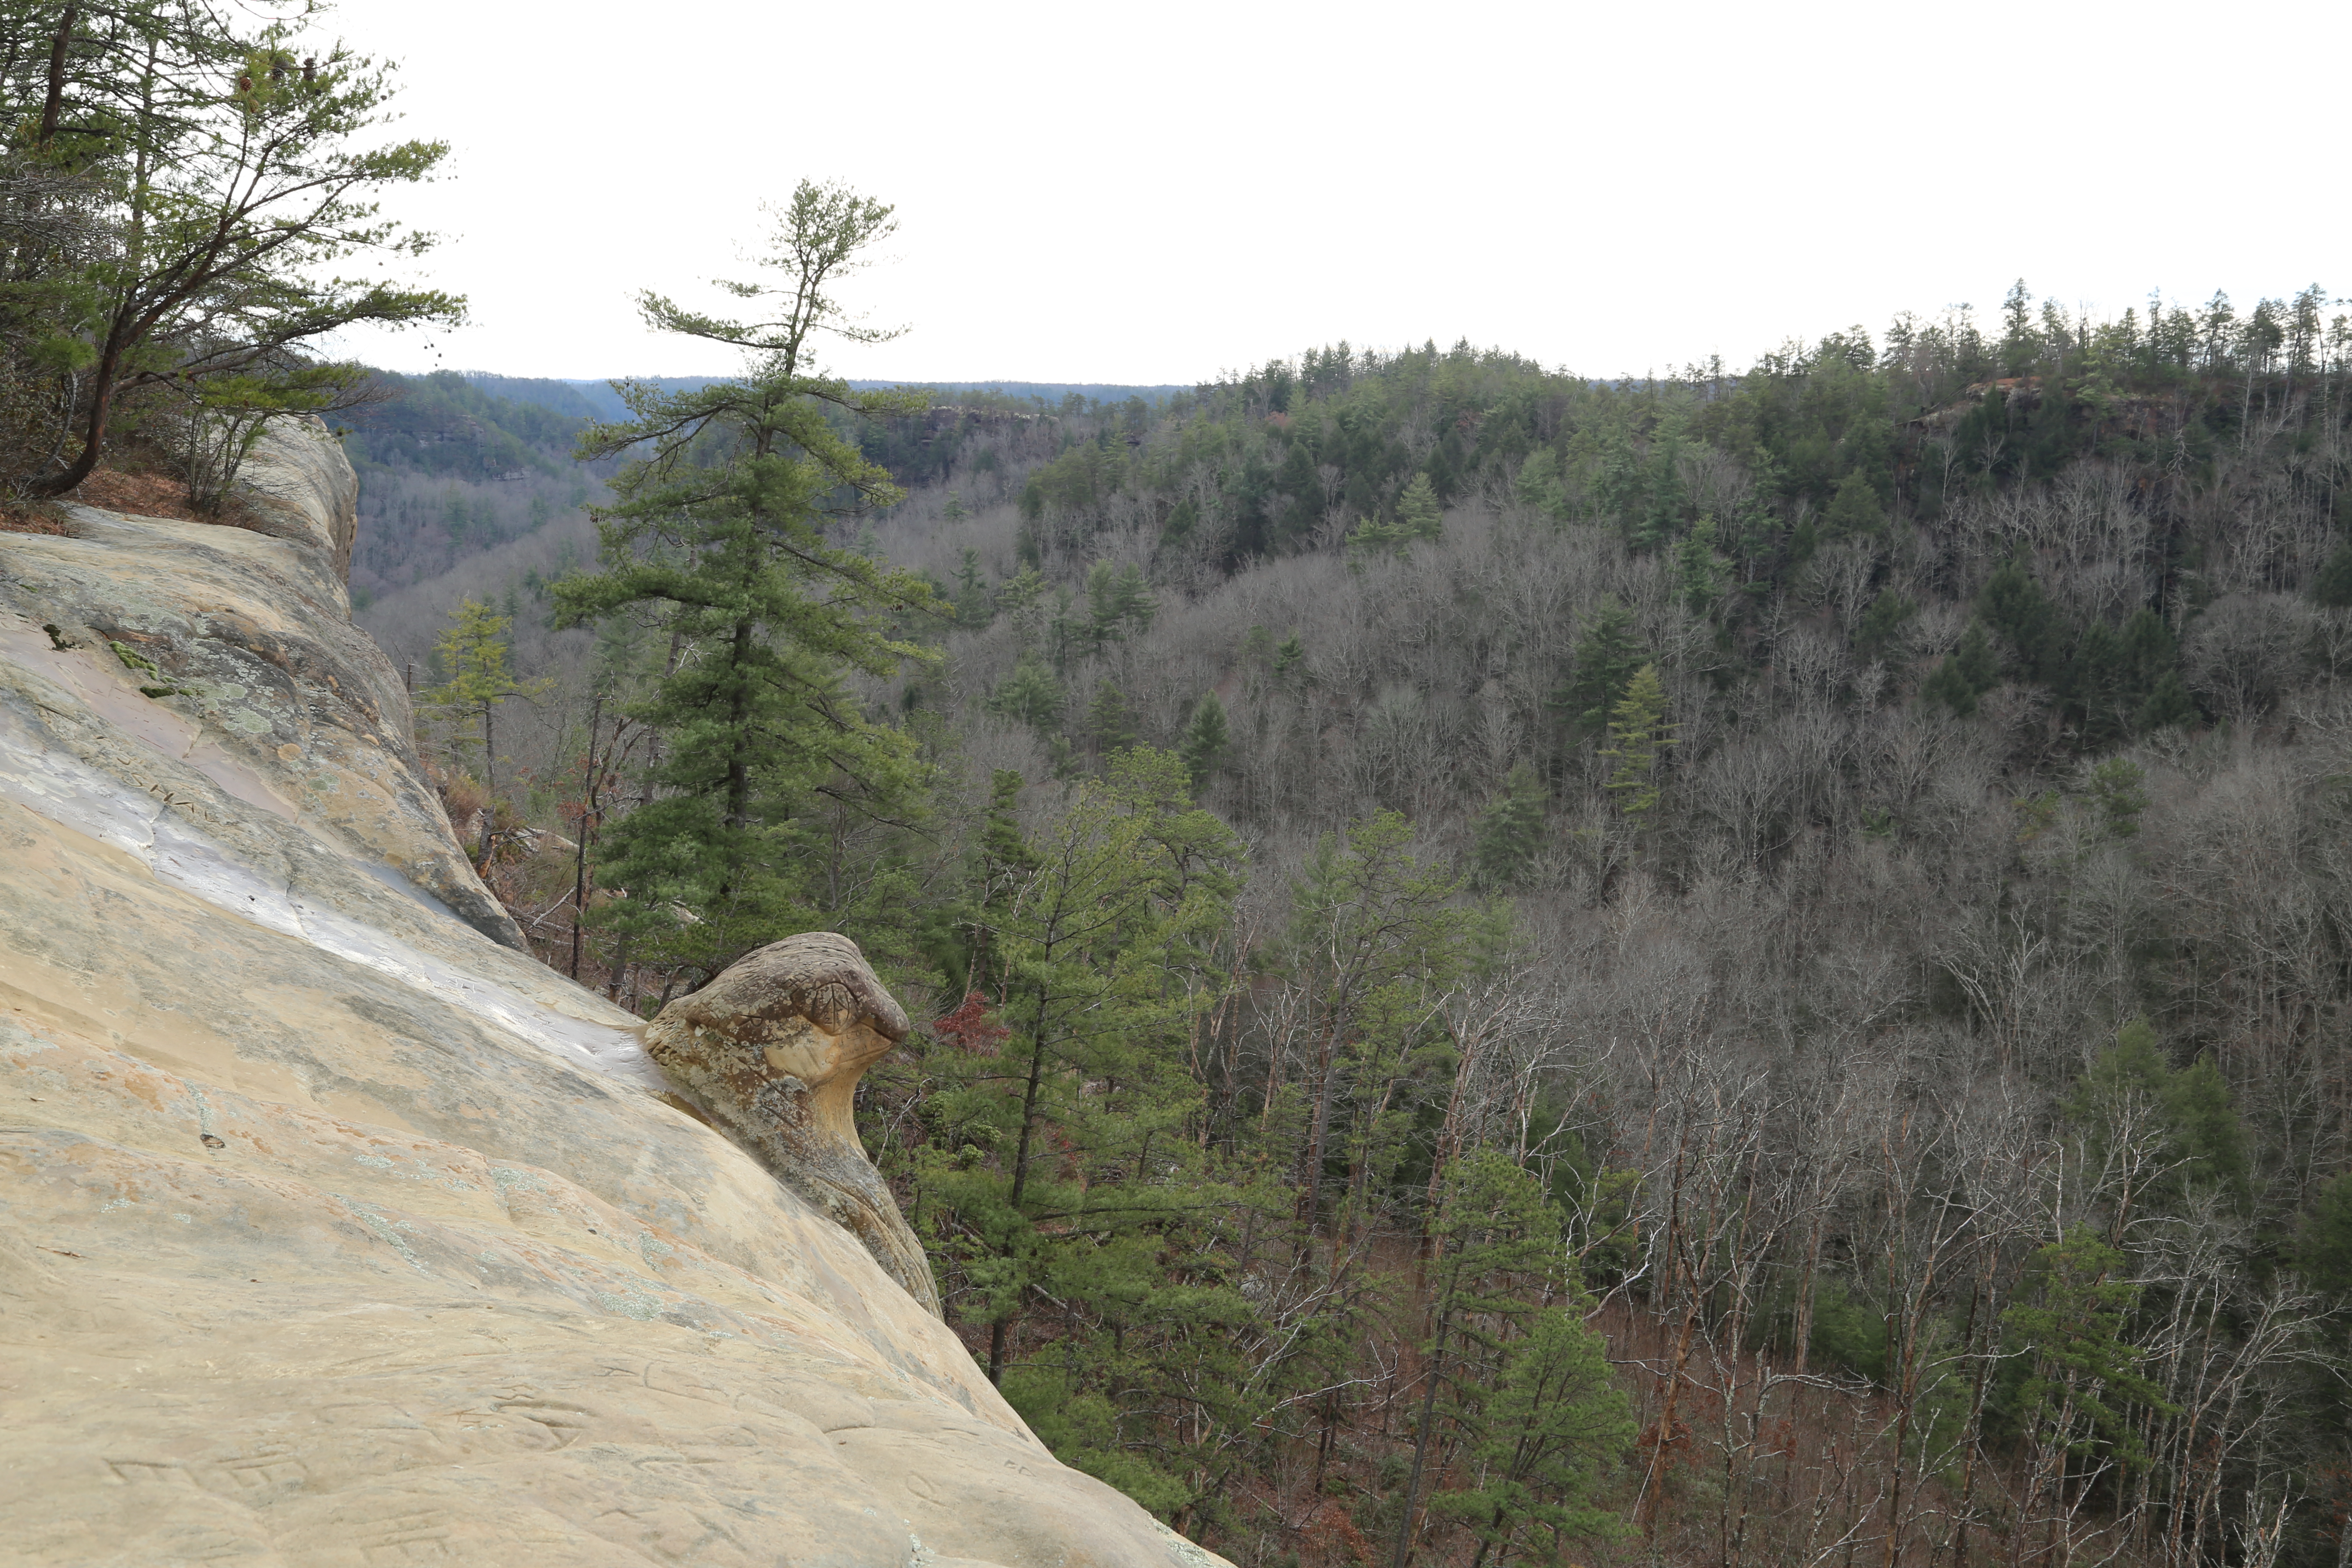
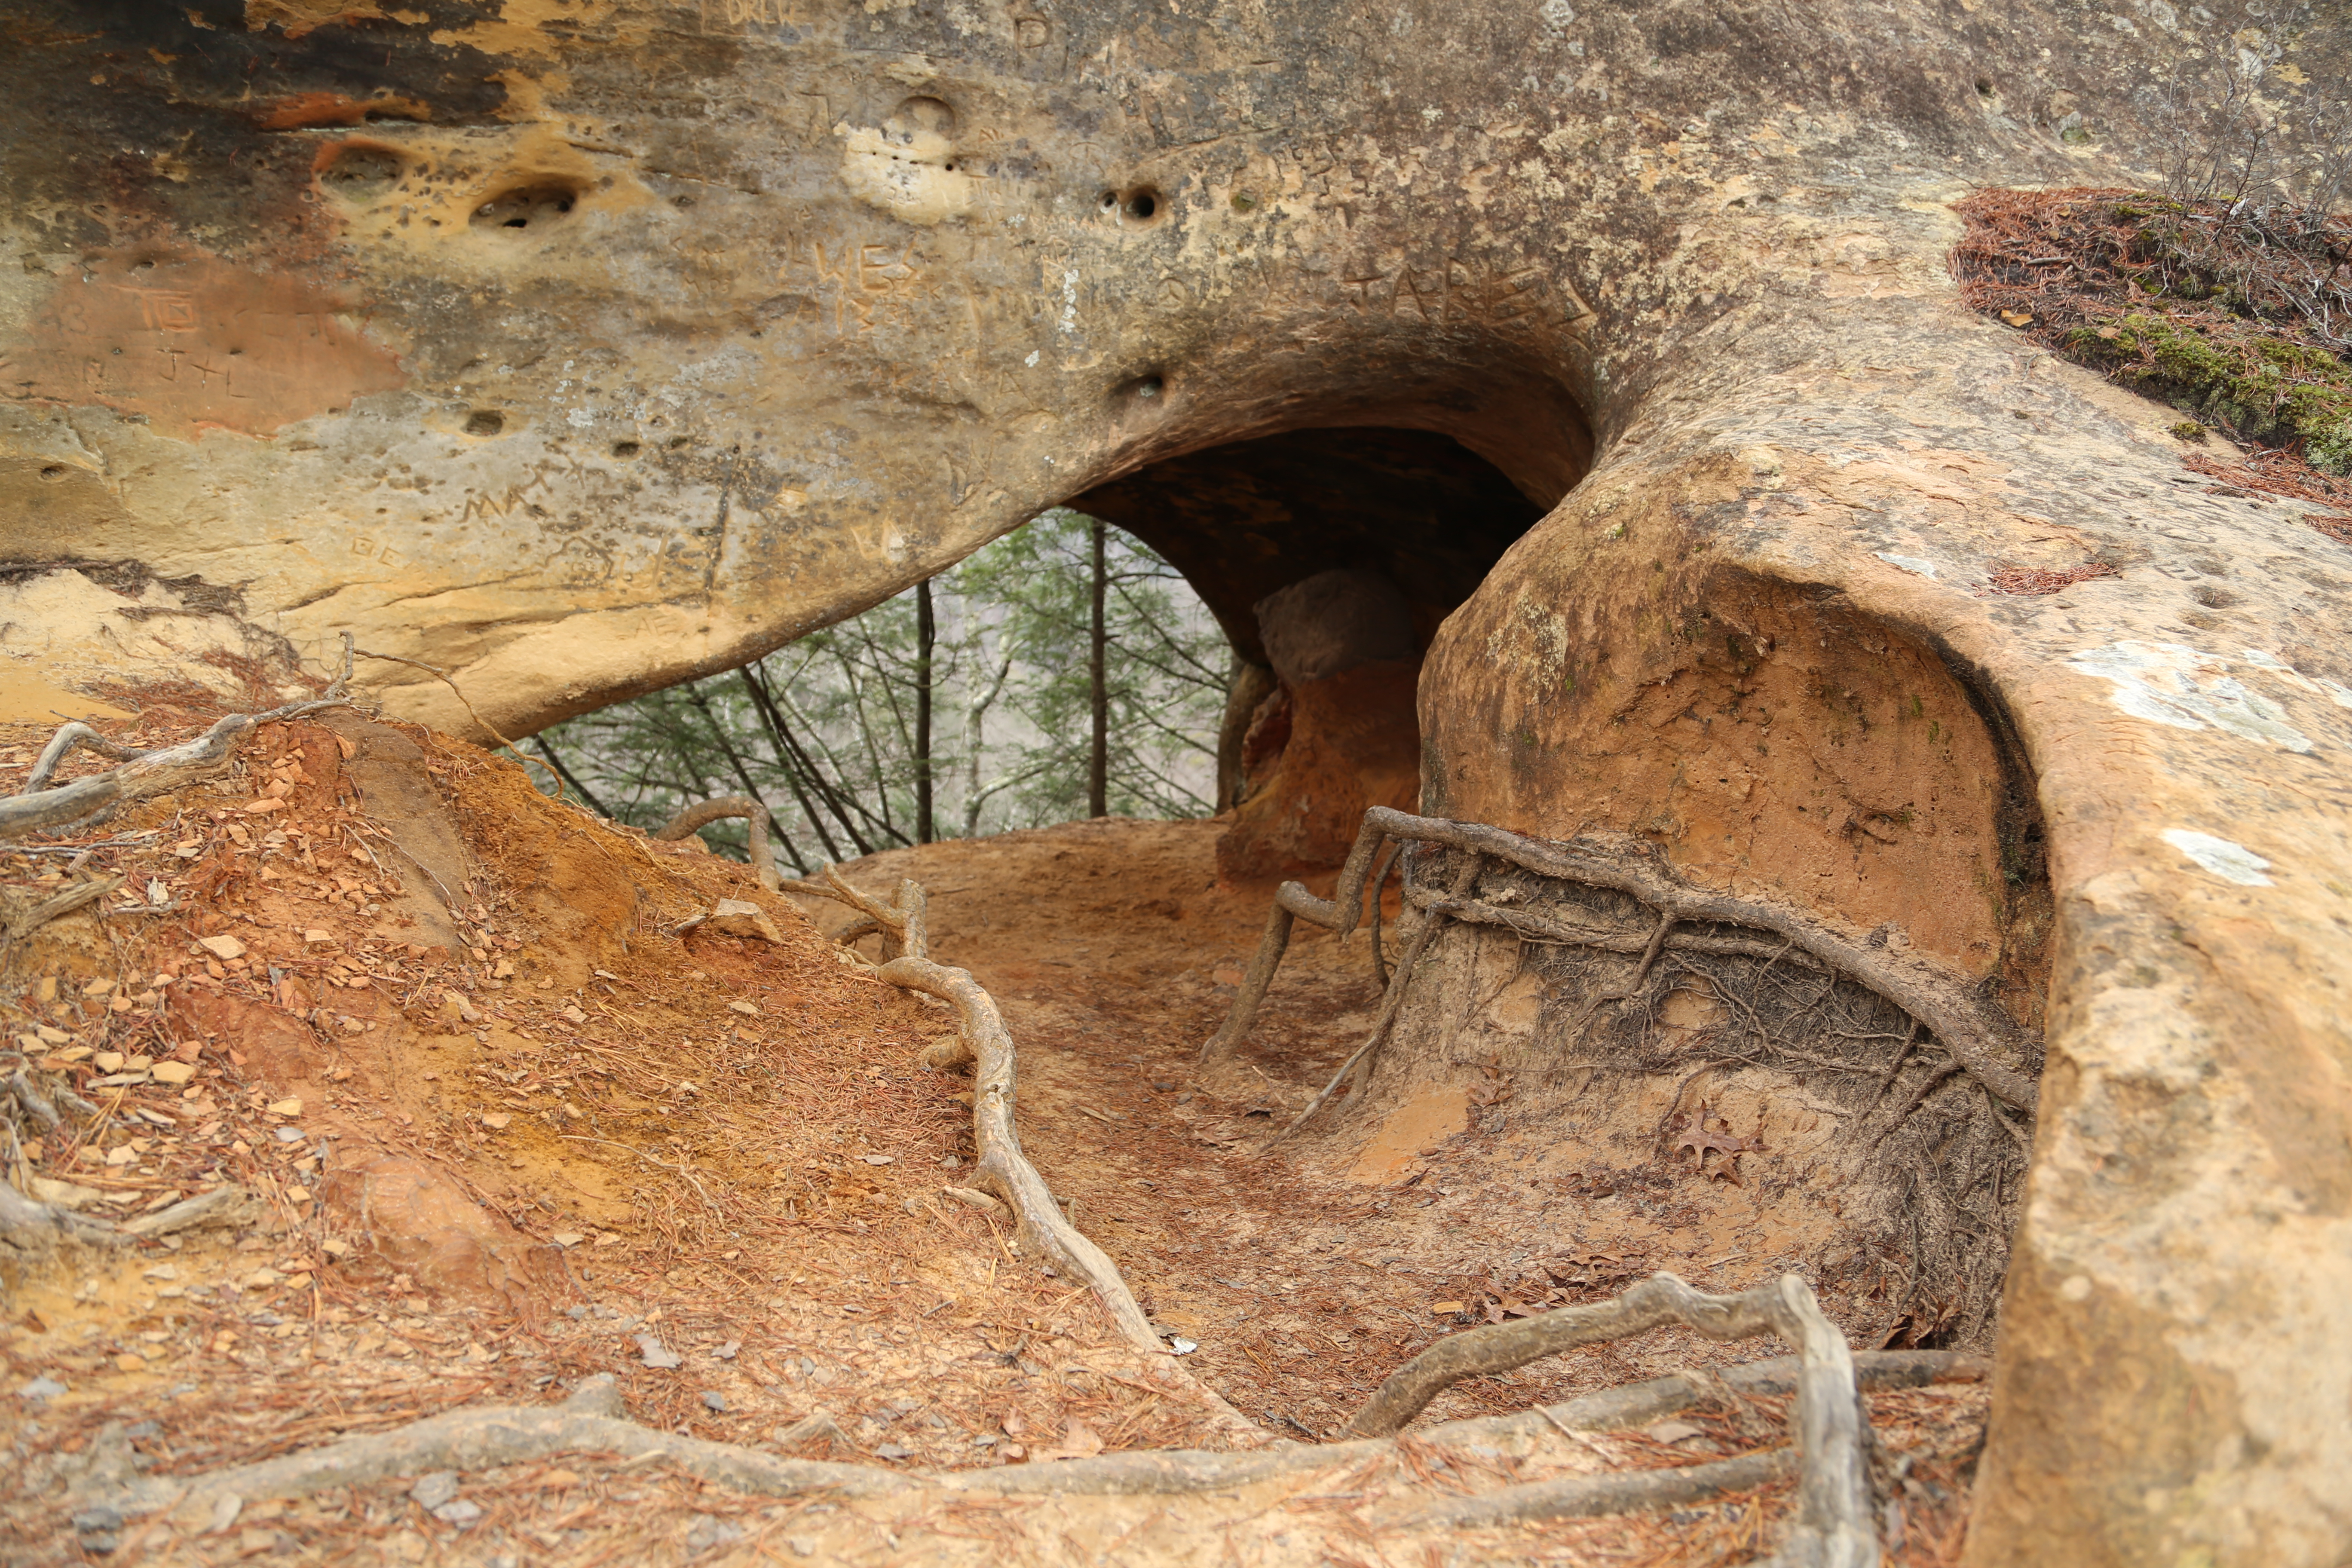
Featured Image: View of Indian Staircase from across the valley.
Located about 45 minutes southeast of Lexington, Kentucky, and an easy two to two-and-a-half hour drive from Cincinnati, Ohio, Red River Gorge is a popular hiking and rock climbing destination in the western foothills of the Appalachian Mountains. Officially known as the Red River Gorge Geological Area, it is part of the much larger Daniel Boone National Forest.
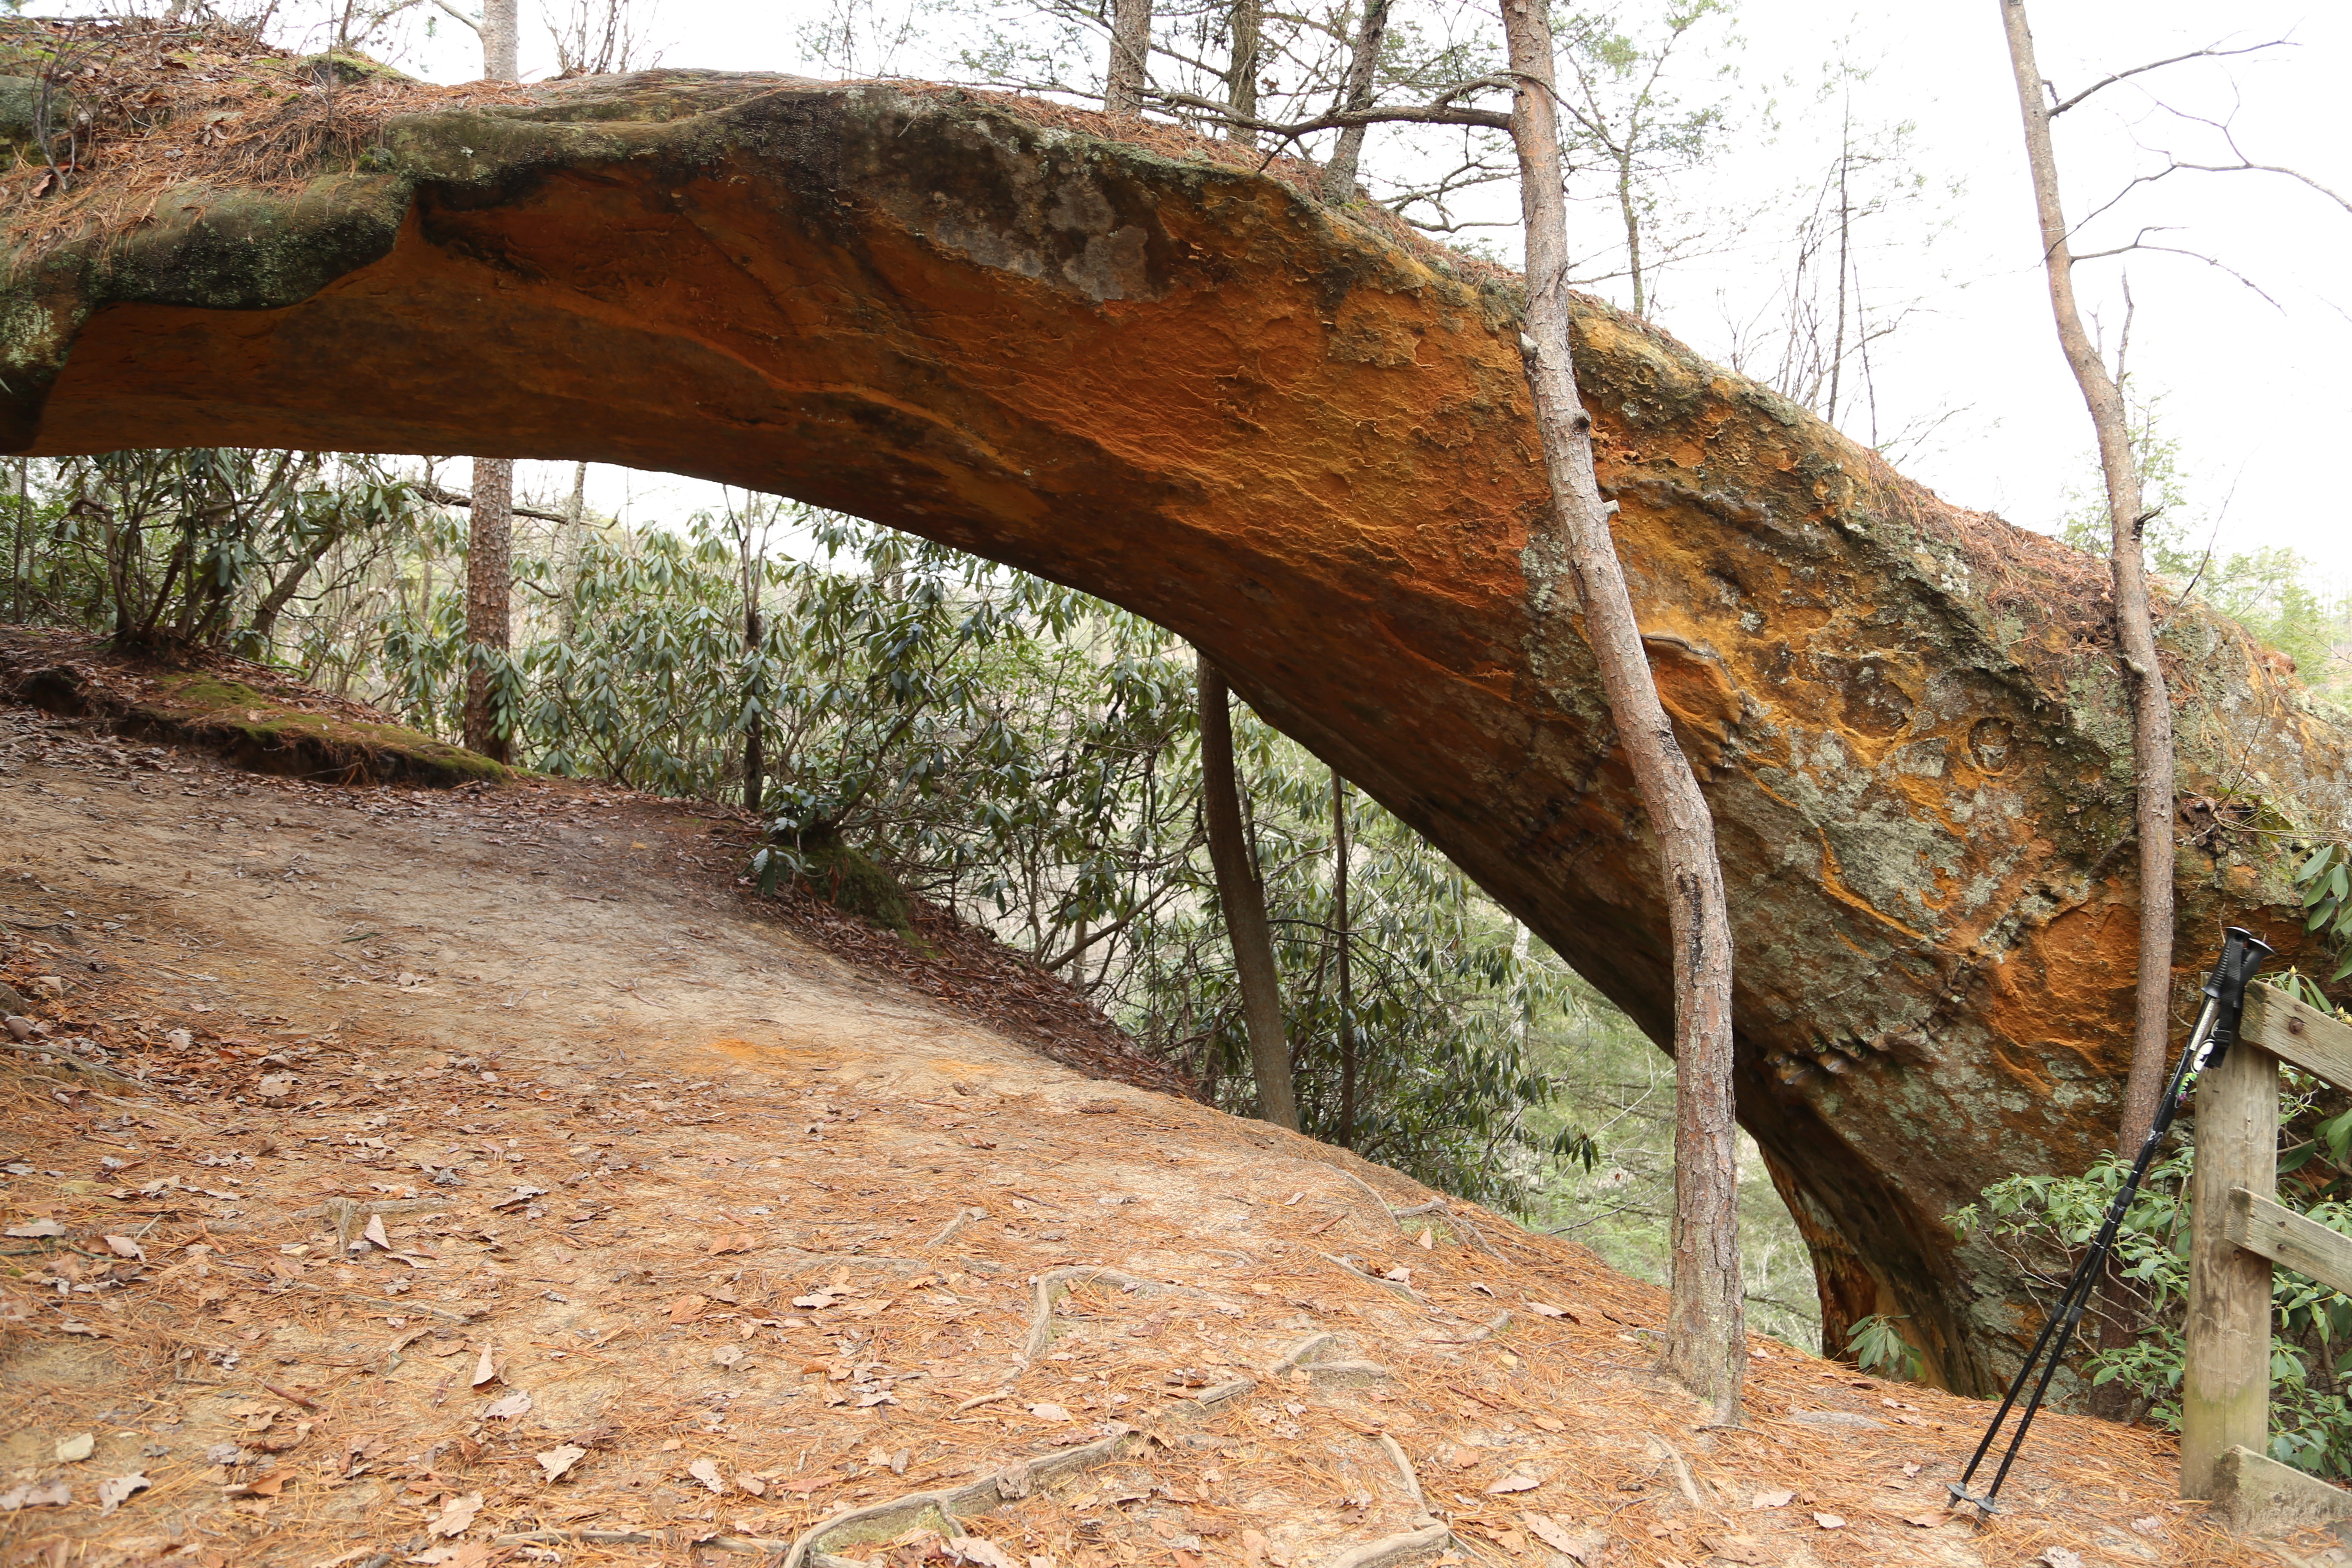
Red River Gorge boasts some of the most unique and rugged scenery in the region and is also home to over 100 natural rock arches from the small but interesting, to large and magnificent. Spectacular views like the header photo of Indian Staircase taken from across the valley are common throughout the gorge.
Hiking in Red River Gorge
There are numerous official trails in the gorge and sticking to these marked trails is a good idea if you are new to the area, an inexperienced hiker, or are hiking with young children. Even the official trails can be rugged and difficult. There are numerous high cliffs with no guard rails throughout the area, so no matter how experienced you are or what trail you are on, exercise great caution. Steep drop-offs are often unseen until you are right on top of them; and if you are hiking with children keep them close by your side at all times! My blog’s “Kentucky’s Red River Gorge” page provides more information on the gorge and also highlights several of our favorite hikes ranging from easy to difficult.
For more experienced, knowledgeable, and confident hikers the gorge offers great opportunities to explore challenging, spectacular, unofficial trails like those around Indian Staircase. Many of these trails are not suitable for children, and climbing Indian Staircase is at the top of that list in my book. Some adults may also be intimidated trying to climb the staircase. Fortunately, those who do not feel adventurous can still explore the area above Indian Staircase, you just have to hike a little farther and double back on the return trip unless you somehow gain the confidence along the way to attempt the downward climb.
Hiking Indian Staircase

Figure 1. Map of Indian Arch and vicinity.
Good topographic maps are a must if you are venturing off the official, marked trails in the gorge. I am a big fan of the map set offered by OutrageGIS, though the 2009 edition I use does not cover the trails around Indian Staircase. I do not know if the 2013 edition has been updated to include this area. For this hike I relied on the US Forest Service’s 2012 topographic map of the gorge (note: this is a 20 MB .pdf file and is a slow download). This is a good map, but it does not show any of the unofficial trails, though I have sketched in the relevant trails on the modified map section shown in Figure 1. The best source of information for this hike was Jerrell Goodpaster’s book, “Hinterlands,” which describes over 100 unofficial trails in the gorge.
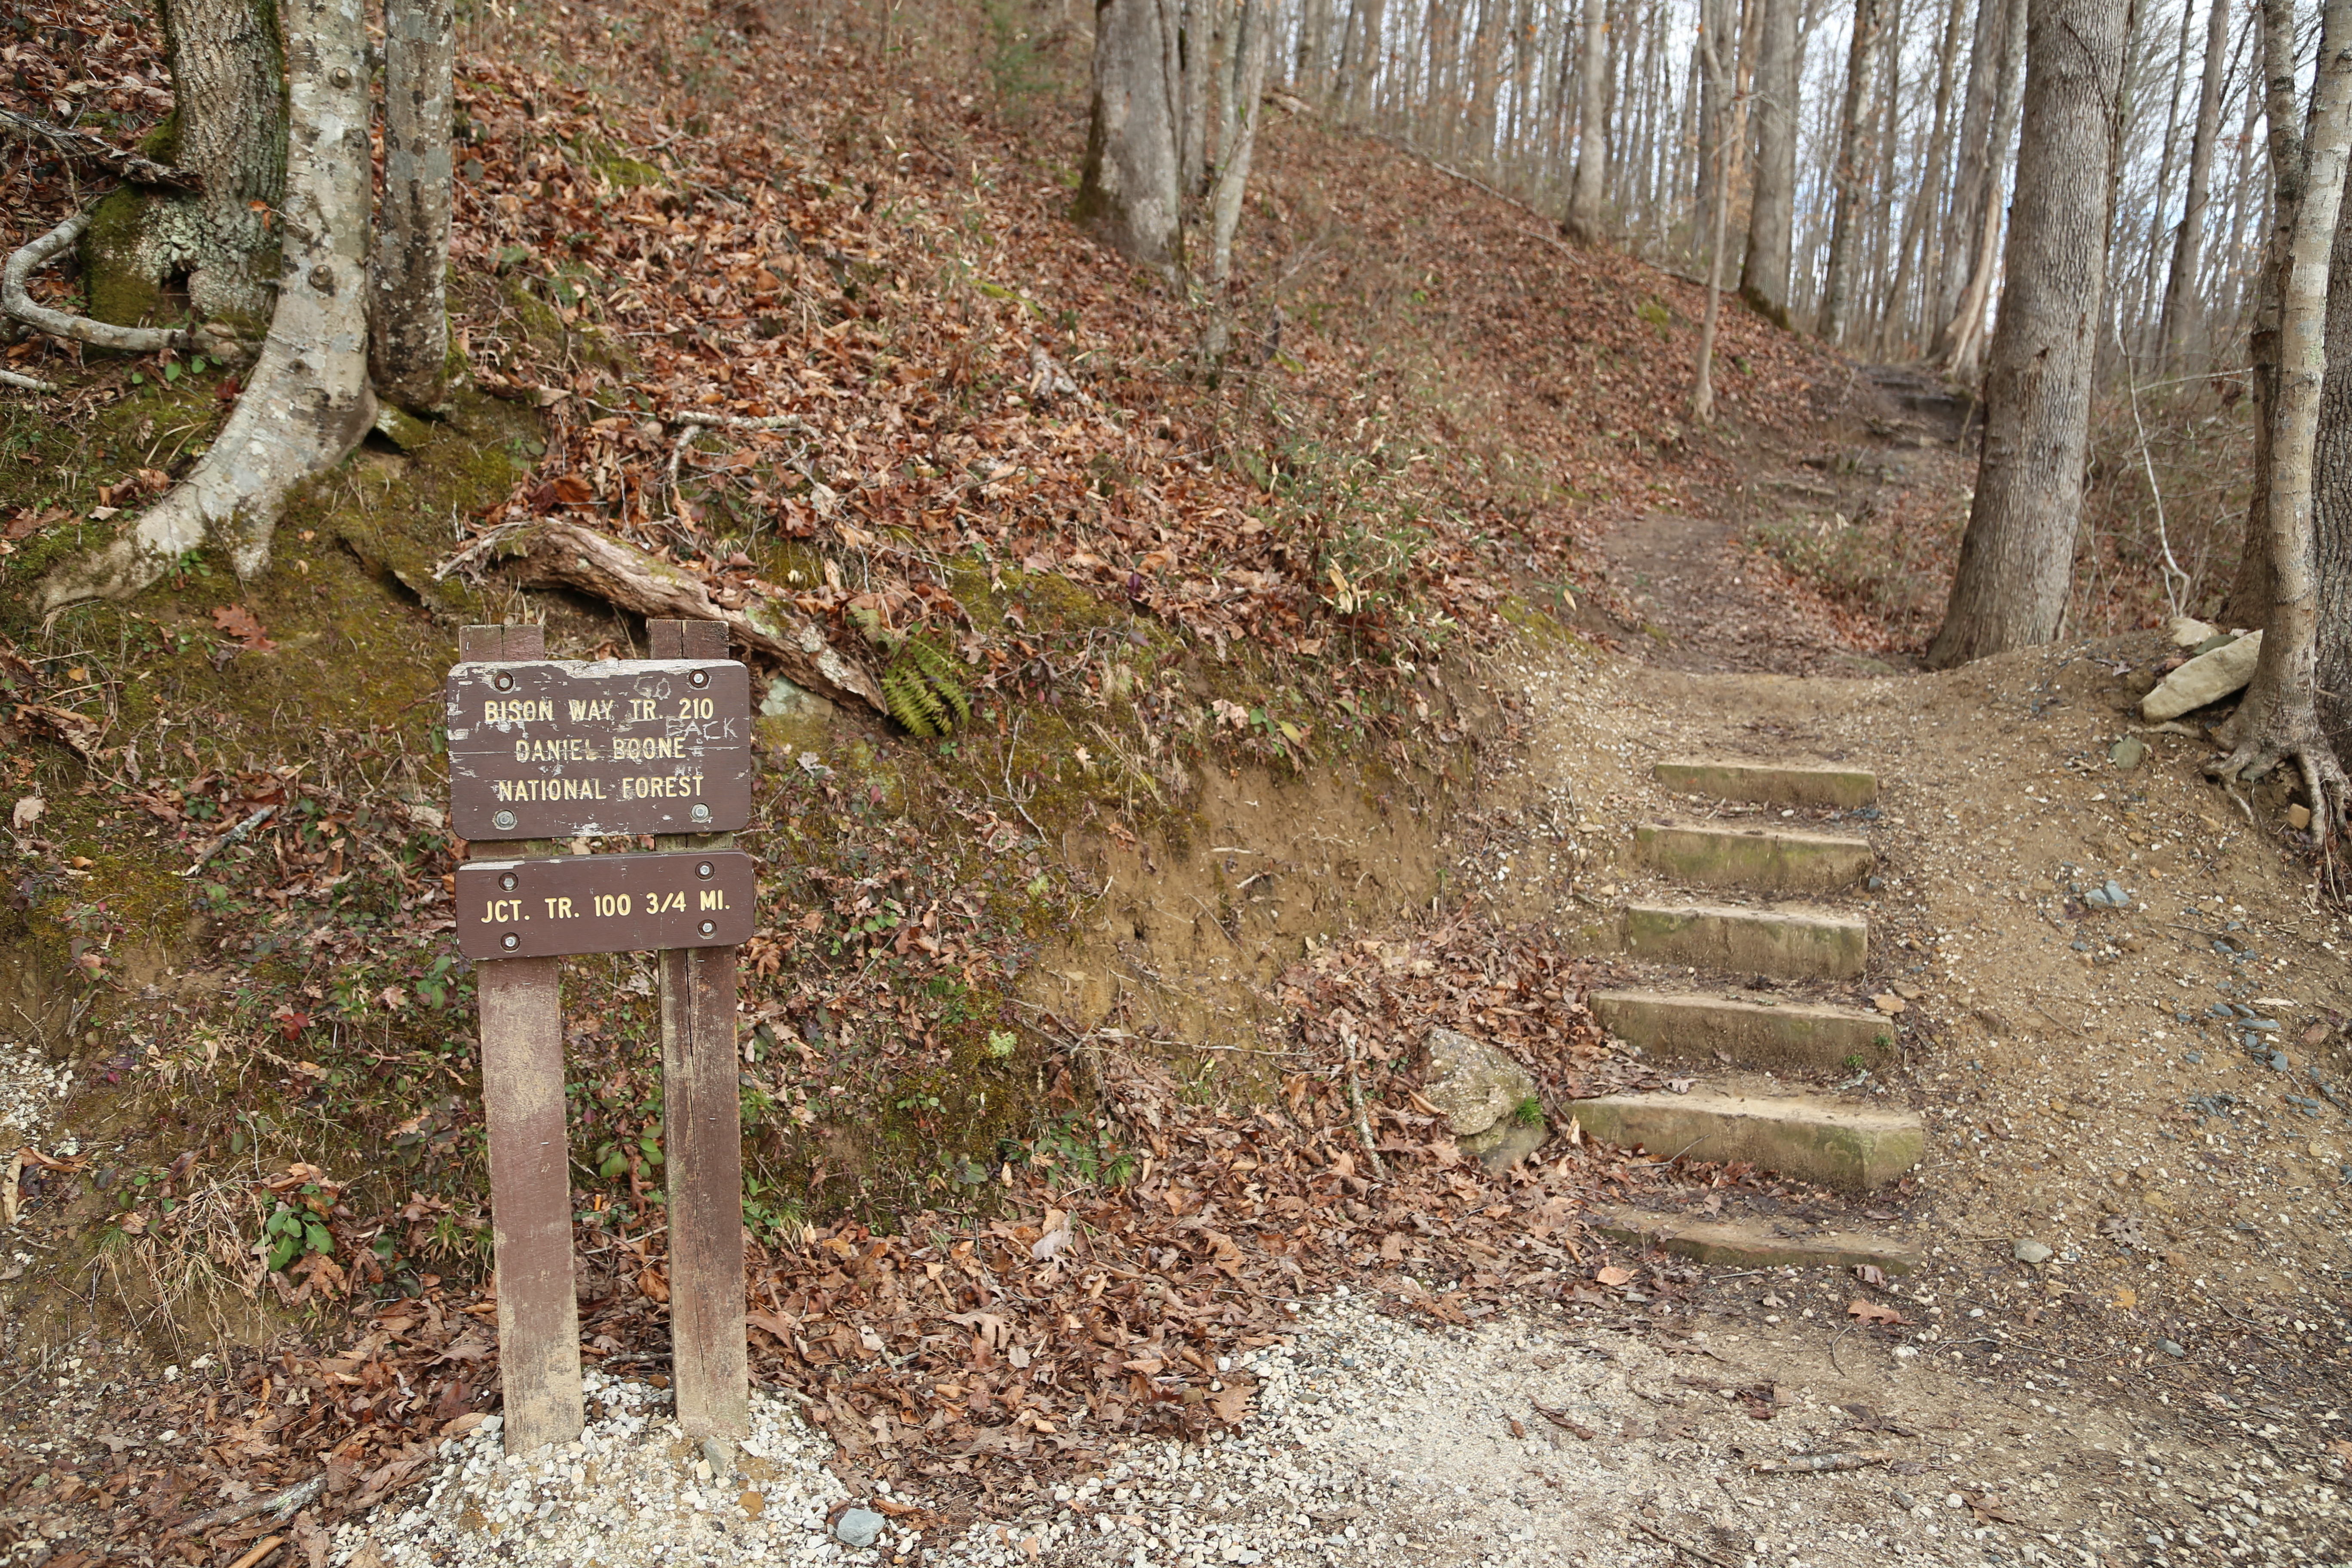
Bison Way Trailhead.
There are several ways to access Indian Staircase if you know the unofficial trails. We chose to park at the Bison Way trailhead along KY-715, near the Gladie Learning Center. We hiked the Bison Way Trail (#210) to the Sheltowee Trace (#100) and followed that west to the unofficial, unmarked approach trail to Indian Staircase. The approach trail is well traveled so it is not too difficult to find the cutoff or follow the trail itself.
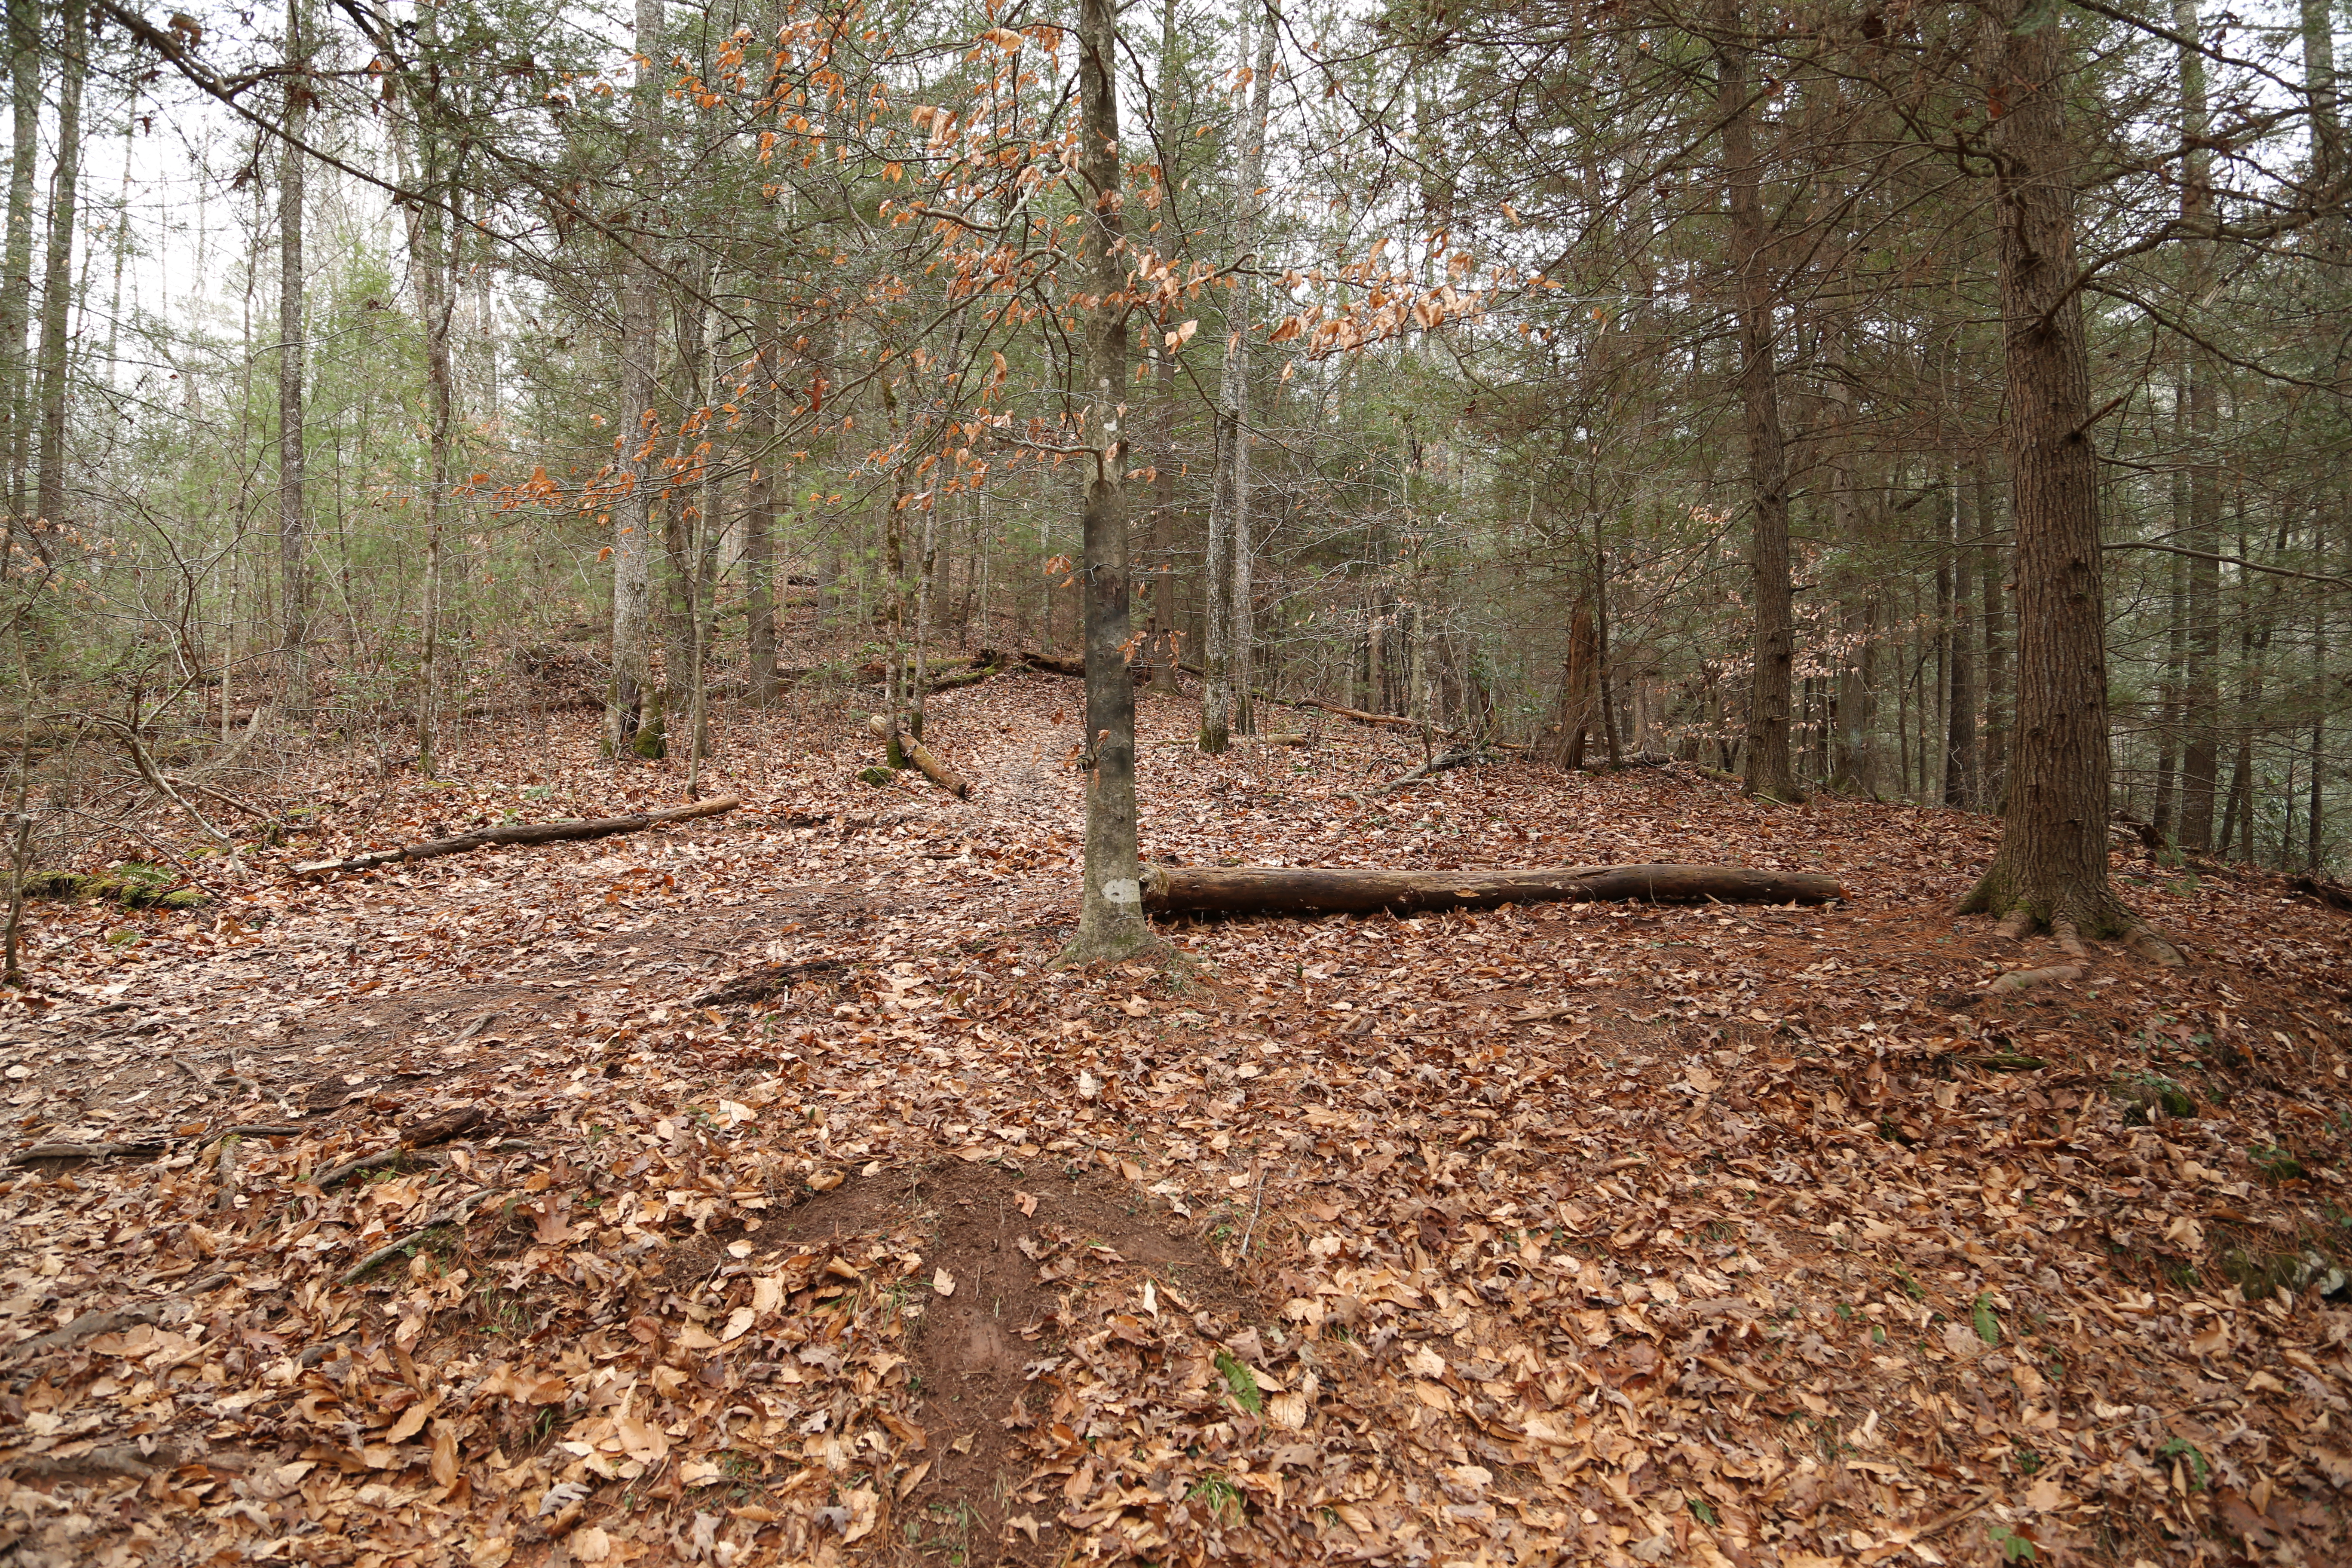
Start of the Indian Staircase Trail. On the day we were there someone had scratched out an arrow in the dirt indicating the way to Indian Staircase.


Two views of the rock scramble approaching Indian Staircase.
The approach trail climbs rapidly, heading northwest off the main trail. After a bit of uphill hiking you reach a rugged dry wash area that requires a scramble up the rocks. After completing this scramble there are several short sections that require a bit of searching in order to find the best way up to the next level. In my opinion the most intimidating part of climbing the staircase for the first time is that your sight range is often limited and you cannot see what lies ahead.

Carved footholds in the smooth sandstone face of Indian Staircase.
The final element of intimidation, though, is the fully exposed scramble up the smooth sandstone rock face with only the shallow carved footholds to assist you. This, of course, is the section of the trail that gives the rock formation its name. As legend has it these indentations were carved by the Adena people over a thousand years ago, though their true age and origin is likely lost to the annals of history. The slope is not as steep as it first seems, and the climb does not take ropes or climbing gear, but the completely exposed face adds a major intimidation factor. No matter how comfortable you might feel on exposed rock slopes, I would not recommend this climb if it is wet or icy!
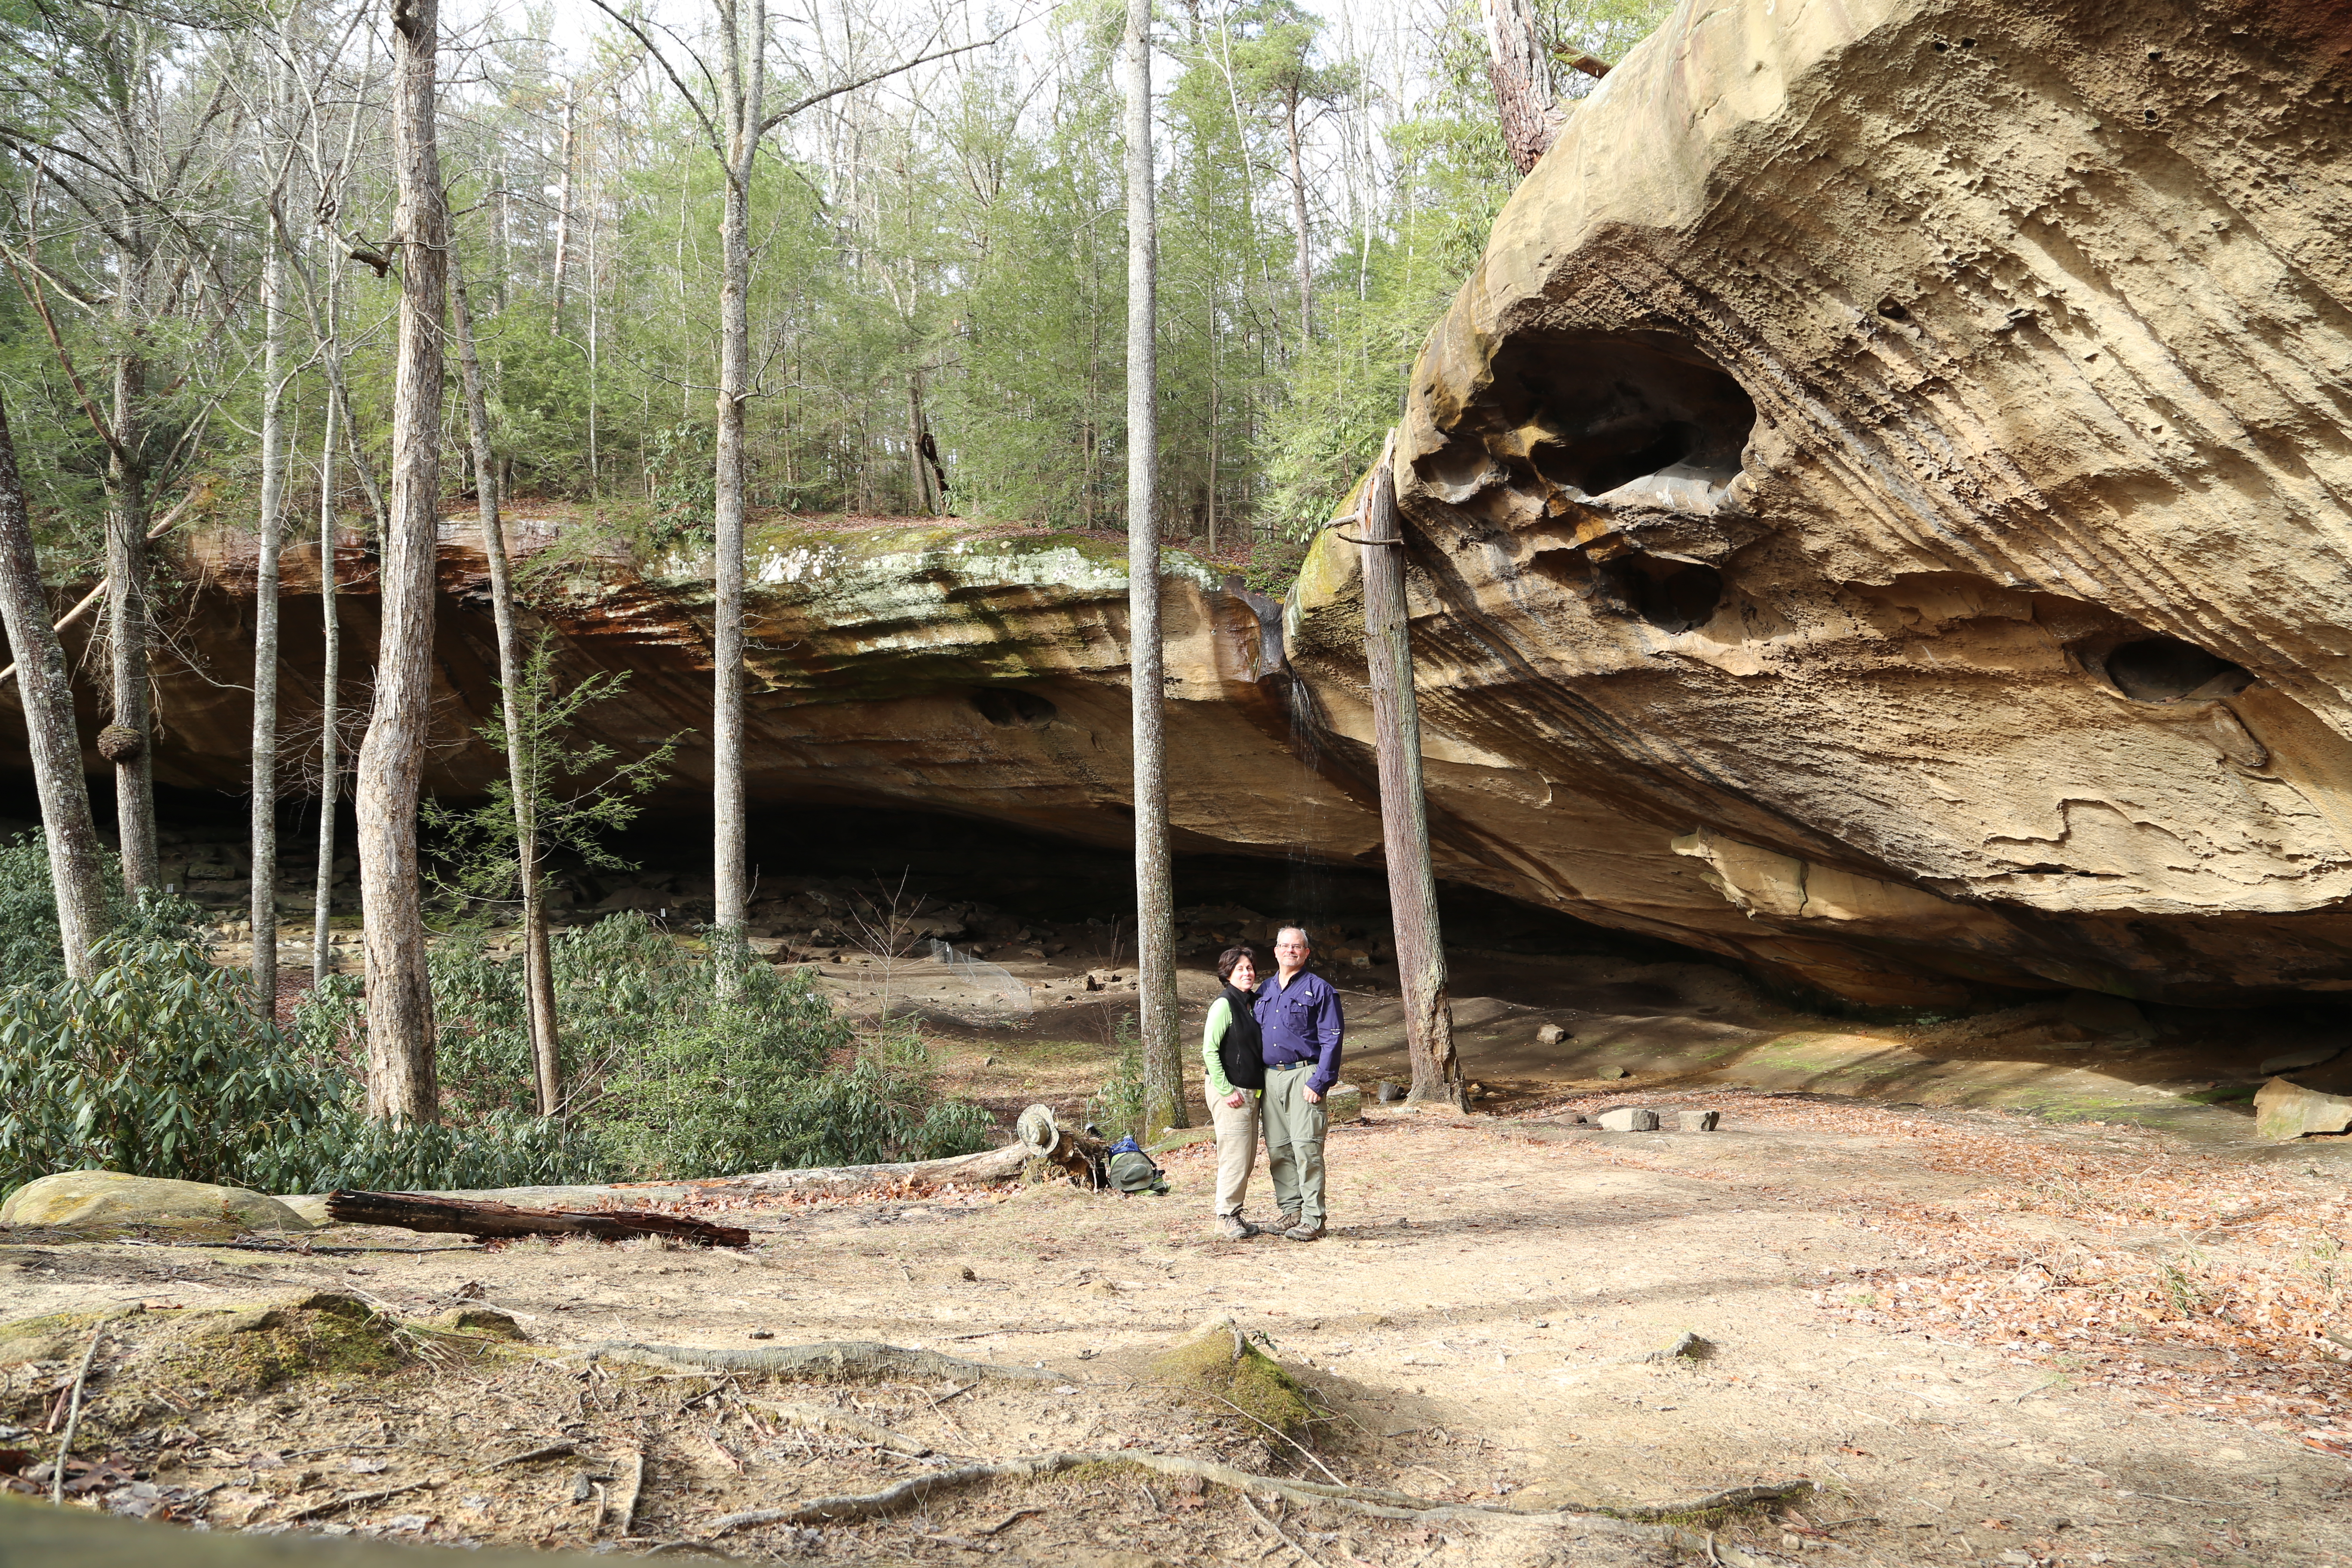
Council Chamber rock shelter.
Frog’s Head Rock, sadly defaced by budding sculptors over the years.
Even if you do not climb the staircase itself, it is still worth taking the long way around to get to the top by following the Sheltowee Trace and coming in from the west. There are a number of great features to explore in the area above the staircase including a spectacular, large rock shelter known as the Council Chamber, and an interesting little rock formation called the Frog’s Head. Regardless of which route you follow, I also recommend taking the unofficial side trail (one mile round trip) out to Adena Arch which boasts some spectacular views of its own.
Adena Arch.
Indian Arch, on the return hike along the Sheltowee Trace.
There are more areas we did not have time to explore on this hike, including the area on top and to the east of the staircase, as well as some interesting sounding features a friend told me about that are beyond the point we turned back near the Council Chamber rock shelter. I look forward to another hike on this route, not only to venture into these unexplored areas, but also to give the staircase a better assessment without the first-time intimidation factor, and to take more photographs documenting the climb. For now, I hope this gives you enough information to find your way on this adventurous hike and that my photographs will inspire you to make the trip to explore this spectacular little corner of Red River Gorge!
© Todd D. Nystrom and Todd the Hiker, 2015.
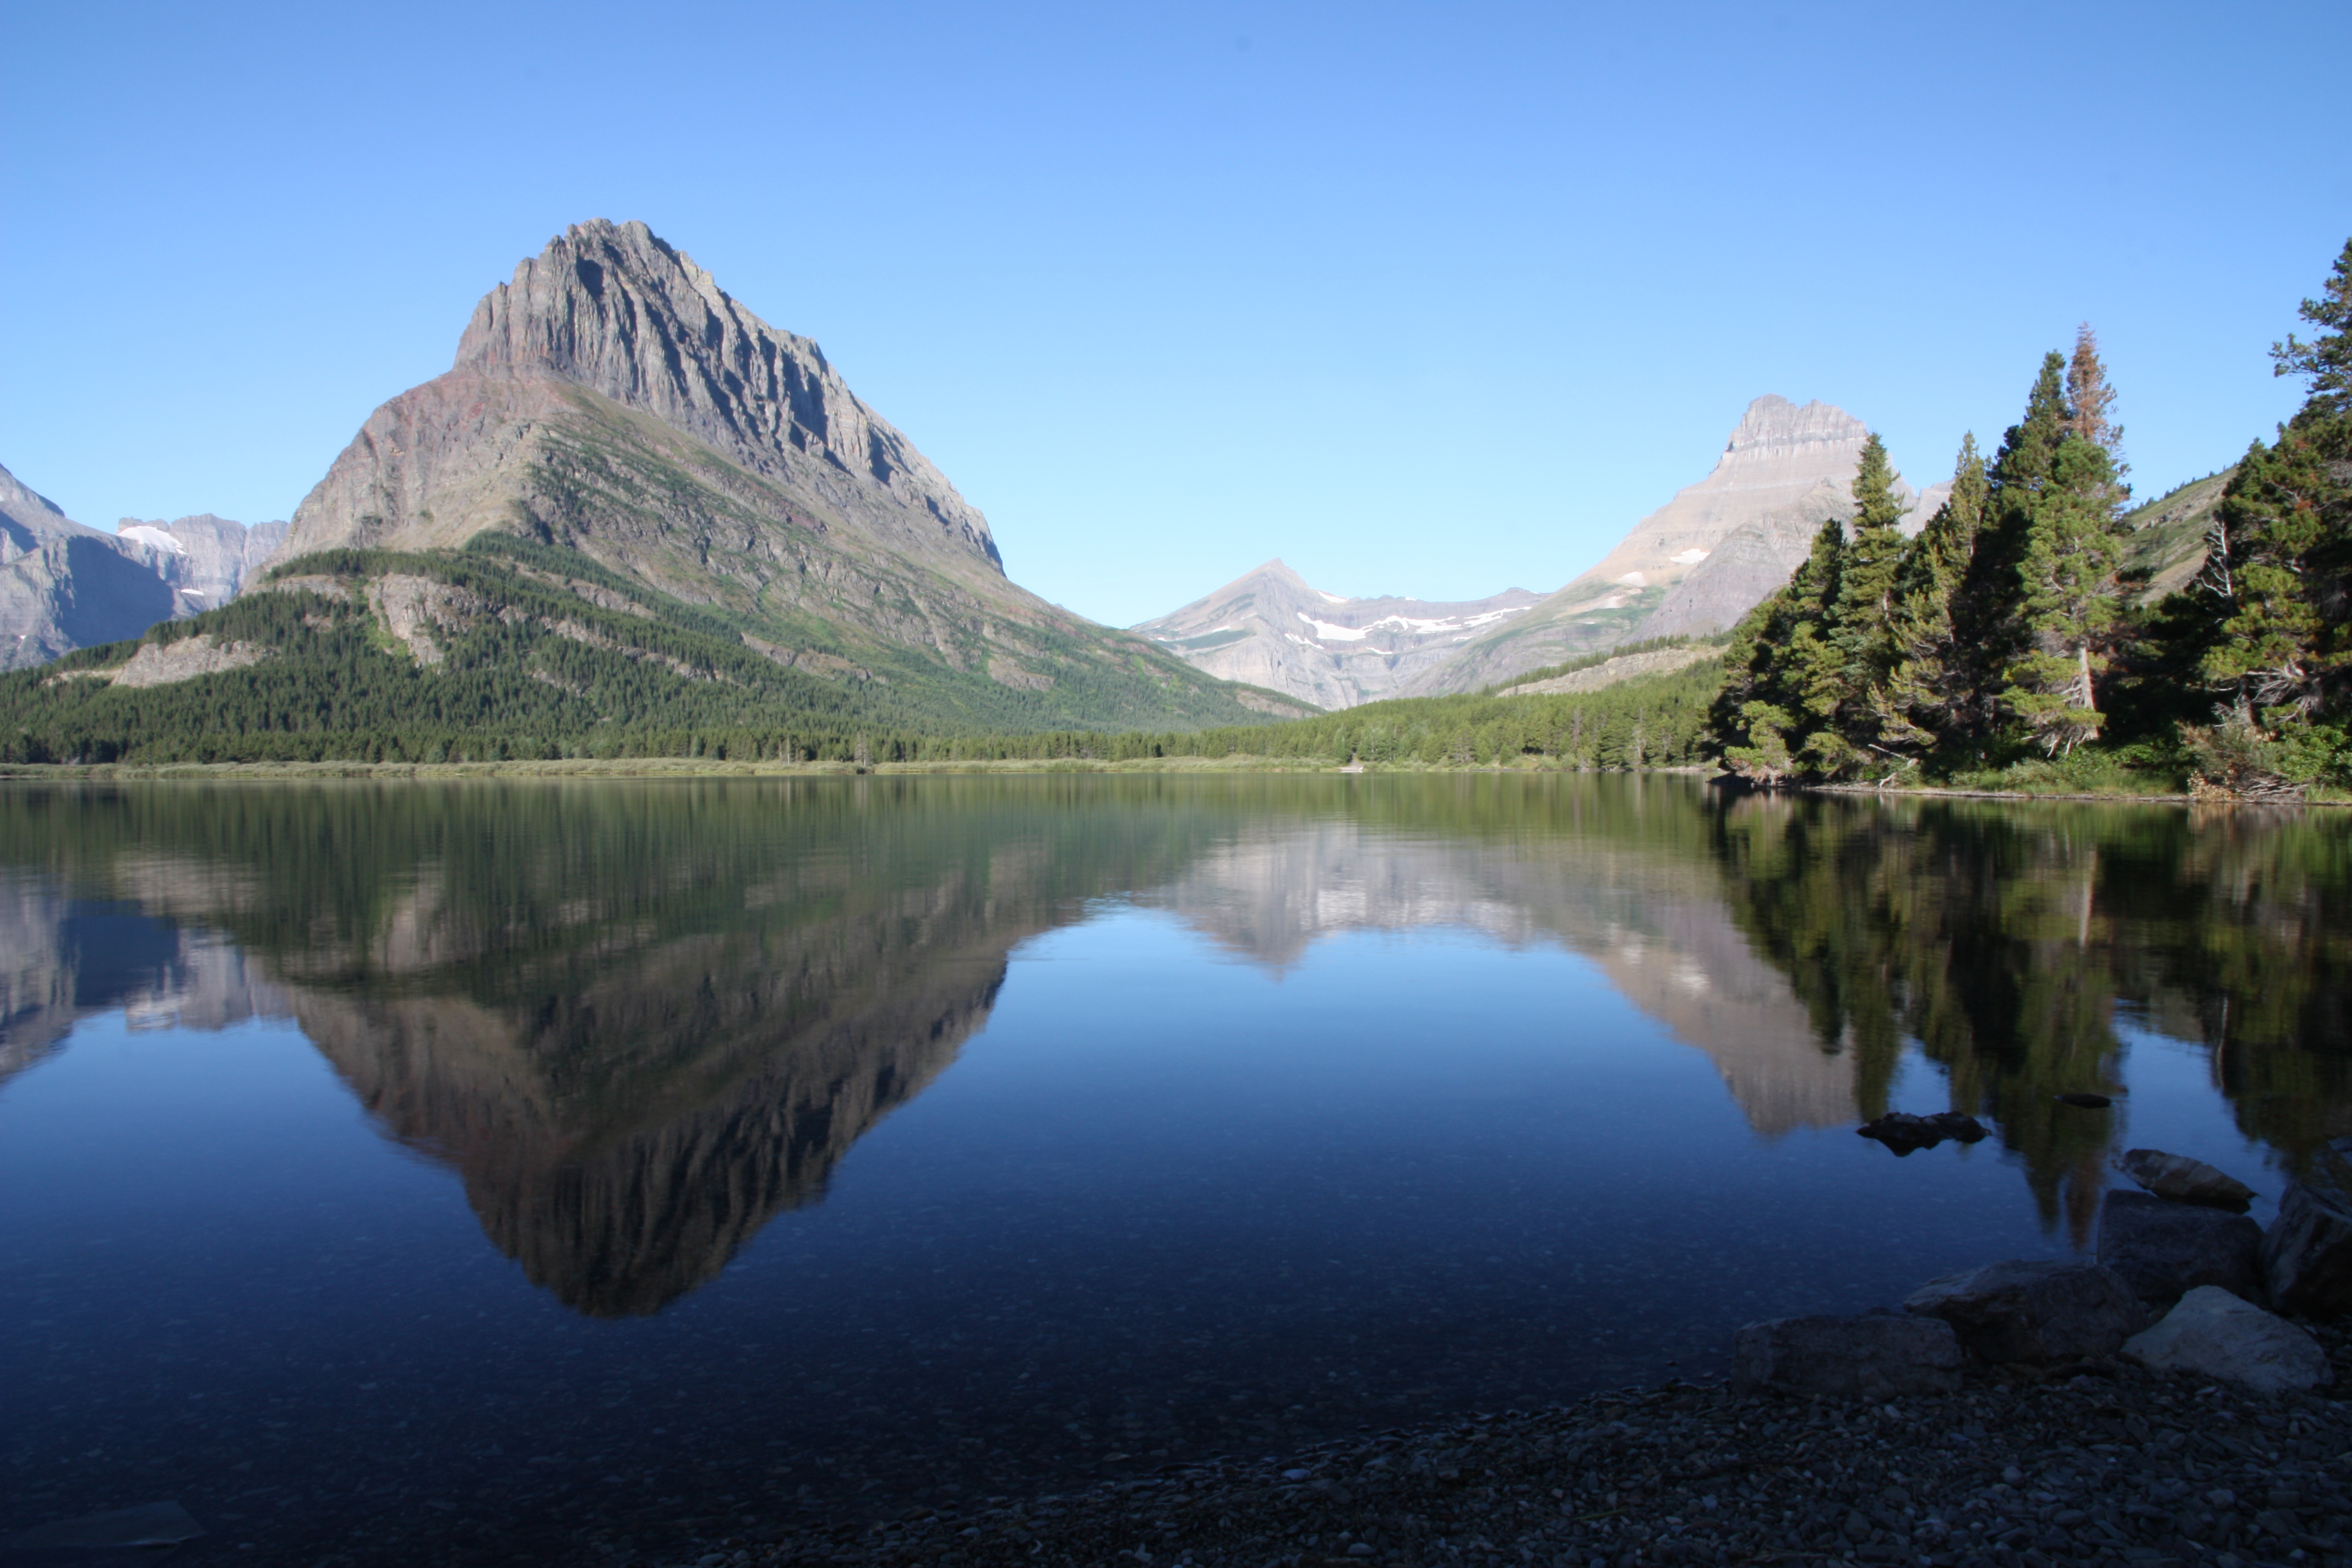
Morning mountain reflection on the still waters of Swiftcurrent Lake in the Many Glacier area of Glacier National Park.
The vastness of Glacier National Park is incredible! Its beauty is impossible to capture in mere words, and photographs only partially convey the wonders we discovered in this amazing corner of God’s great creation. It really needs to be experienced in person to be fully comprehended!
Traveling to Glacier National Park
Glacier National Park is located in northwestern Montana and borders Waterton Lakes National Park (Canada) in the southwestern corner of the province of Alberta. If you plan to visit Canada bring your passport and do some research so you know what items you are allowed to bring with you going into Canada, as well as returning to the US.
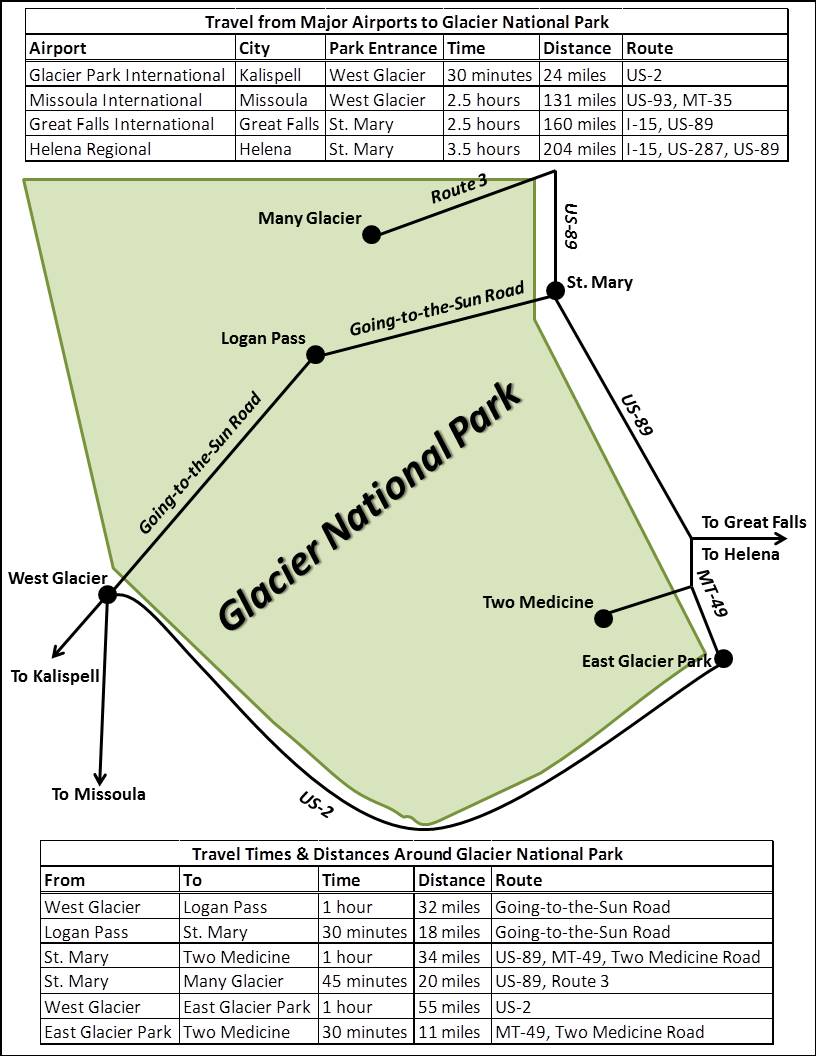
The closest airport is the aptly named Glacier Park International Airport in Kalispell, Montana, about 30 miles from the western entrance of the park. Also, Kalispell is a large enough city to find any gear and supplies you might need for your adventure at reasonable prices. The tables and chart below will help orient you with the area, and also provide drive times and distances between major areas around the park, as well as to other airports in the region.
When to Visit
While you can visit Glacier any time of year, keep in mind much of the park is inaccessible in the winter, and the season when all the roads are open is relatively short. Going-to-the-Sun Road, the only road that fully spans the interior of the park from east to west, typically opens in early July and closes in late October; but, I highly recommend checking the Alerts and Current Conditions page on the official NPS website regardless of when you plan to visit as heavy snows and construction often affect the opening and closing dates. Also, peak visitor times and the best season for road construction typically coincide in many national parks; for example a major project in 2020 and 2021 will significantly increase travel times to and from the Many Glacier area during both of those summers. By planning ahead, arriving early, and taking park shuttles when and where available you can hopefully minimize the impact during your visit.
Where to Stay
Whether you plan to stay in one of the grand old lodges, a rustic cabin, a front country campground, or do some backcountry camping, there are plenty of options available. The one common element, regardless of your choice, is the need to plan well in advance of your trip. The lodges book early; and, while there is a mix of reserved, as well as first-come-first-serve campsites, you want to know what to expect. Rather than going into great detail here I suggest starting your research at the following pages on the NPS website:
Lodging: There is a variety of lodging options in and around the park, though the prime months of July and August book up quickly, so make reservations as early as possible. We booked in January for a mid-August trip and could only find openings in the East Motel of the St. Mary Lodge & Resort. The room was clean and adequate, but very small with no frills, and quite expensive! Remember you are paying for the location, and hopefully you haven’t traveled all this way just to sit around in your hotel room! The food and service were good and the stores appeared to have everything you might need at fairly reasonable prices, though we had stocked up in Kalispell before heading to the park, just in case.
Camping: There are 13 campgrounds with over 1000 sites.
Backcountry Camping: As with any national park, if you plan to go backpacking and backcountry camping many regulations apply and permits are required, so you really need to do your homework.
Be Prepared
Glacier National Park is a vast wilderness and, depending on which trails you hike, the number of people you encounter can vary significantly. Even on the busiest trails we sometimes went a while without encountering other hikers. Also, do not expect to be able to use your cell phone to call for help as service fades quickly once you enter the park.
As with any mountain wilderness outing, you need to be equipped with proper clothing, gear, and supplies, including extra warm layers, raingear, a hat, sunglasses, and sunscreen, some form of makeshift shelter, sufficient water and/or a way to purify water, food, first aid kit, flashlight or headlamp, whistle, emergency fire starting materials, and, finally, a good map and compass.
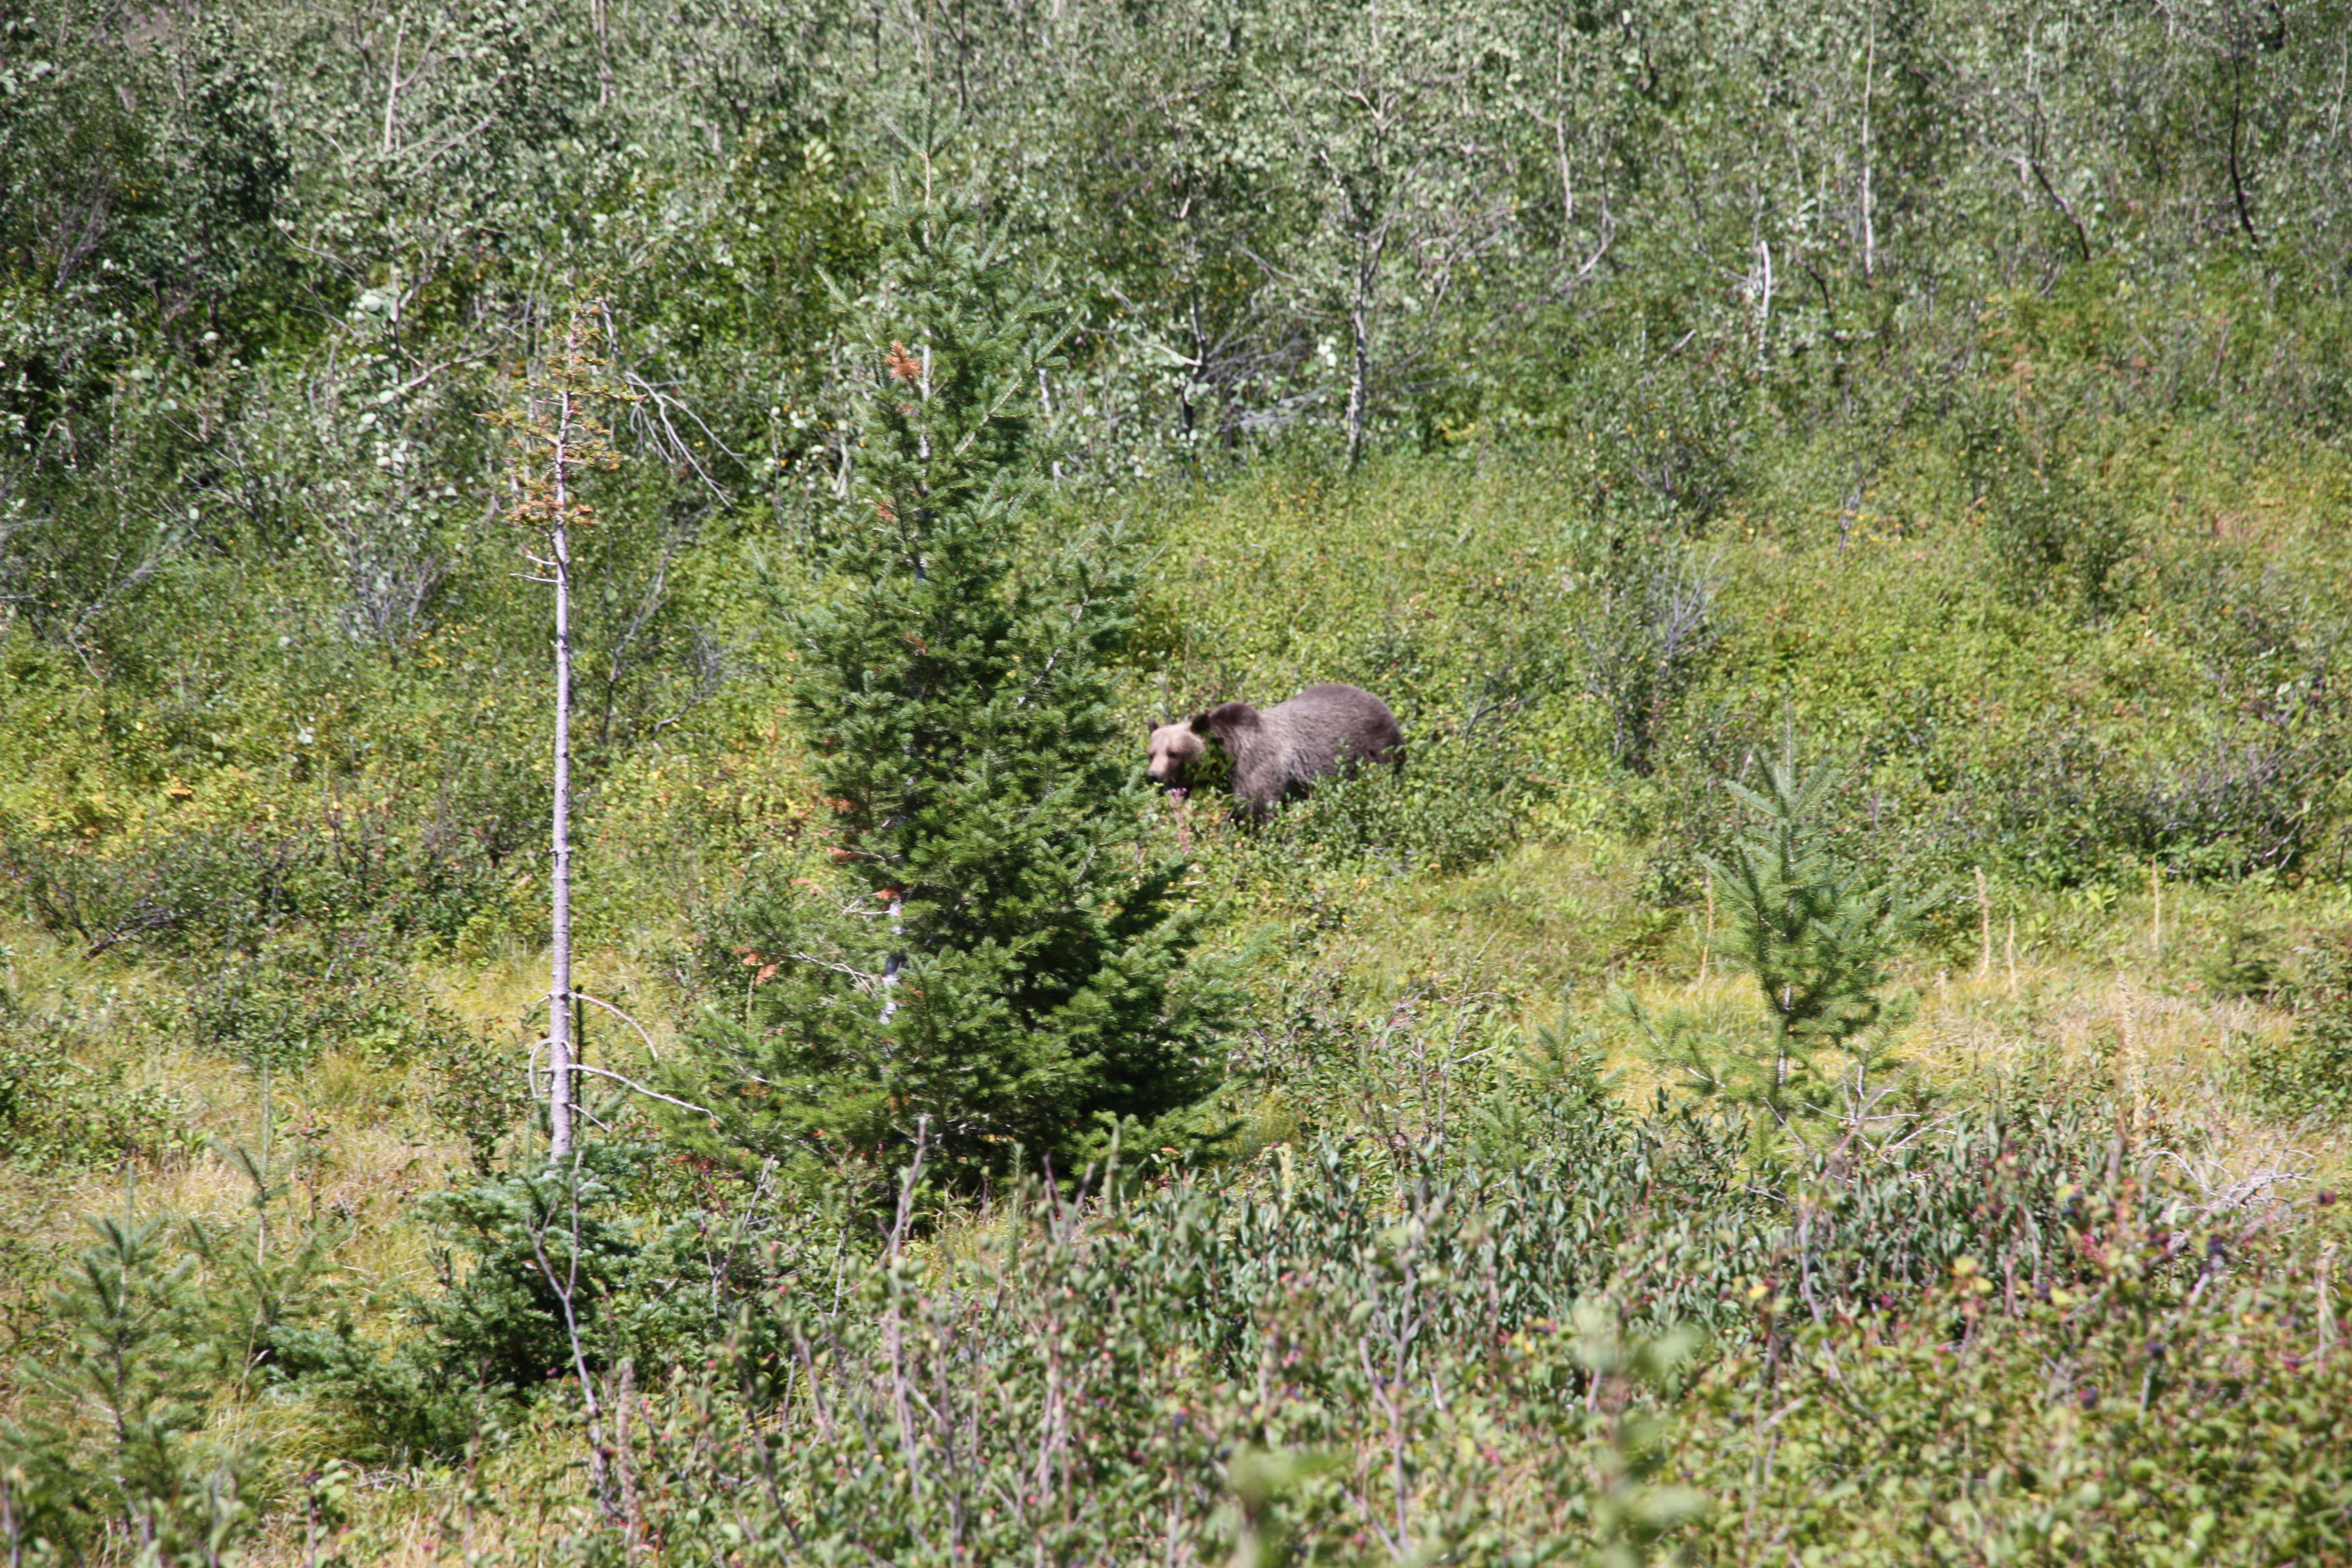
Grizzly bear eating berries along the Iceberg Lake Trail.
This is also bear country, home to both grizzly and black bears. We saw several of both during our visit, most from the safety of our vehicle, though we did encounter one grizzly, about 30 yards away, while hiking the Iceberg Lake Trail. Read up on bear safety, heed the recommendations to not hike alone, and have every adult carry bear spray. Also, be aware if you are traveling by air, you cannot transport bear spray in either your carry-on or checked luggage so you will need to purchase it upon arrival. All the stores in and around the park had bear spray for sale, though I did some research when we took our trip and found a used sporting goods store in Kalispell where we were able to purchase bear spray for $25 a canister and return it for a $10 refund (2012 rates), assuming the canister was not discharged. The store we used is now closed, but considering a canister of bear spray currently costs around $50, taking time to do some some online research and calling around could save you a bit of money.
There are five major areas of the park including, Lake McDonald, Many Glacier, North Fork & Goat Haunt, St. Mary (includes Logan Pass), and Two Medicine. We did not do any hiking in the Lake McDonald Valley, though we did drive through on Going-to-the-Sun Road, but never even came close to remote North Fork/Goat Haunt area.
There is a great shuttle system with numerous stops along Going-to-the-Sun Road that is available at no extra cost. This is a convenient way to do some point-to-point hikes along Going-to-the-Sun Road. It is also a great way to get to Logan Pass without the concern of finding a parking spot; plus, you get to watch the scenery along the way rather than the road and other vehicles. Pay close attention to the shuttle times, though, especially later in the day, as you do not want to get stranded at the end of a long hike without a way back to your vehicle, except a long walk in the dark.
In all, we hiked about 45 miles over seven days and barely scratched the surface of the 740 miles of trails Glacier has to offer. As I said earlier mere words cannot do justice to this magnificent place, so I will provide only brief technical information about each hike and let the my photographs do the rest. All the trails we hiked were well marked so navigation was not difficult, though having good topographic maps will provide an added measure of confidence.
Highline Trail to Haystack Butte from the Logan Pass Visitor Center; 7.2 miles out-and-back; some ups and downs along the way with a significant climb at Haystack Butte.

Bighorn sheep ram charging down the narrow Highline Trail and frightening hikers near Logan Pass.

Indian paintbrushes with Haystack Butte in the background.
St. Mary Falls & Virginia Falls from the St. Mary Falls trailhead (St. Mary Valley); 2.9 miles out-and-back; some minor ups and downs along the way with a moderate climb to get up to Virginia Falls.
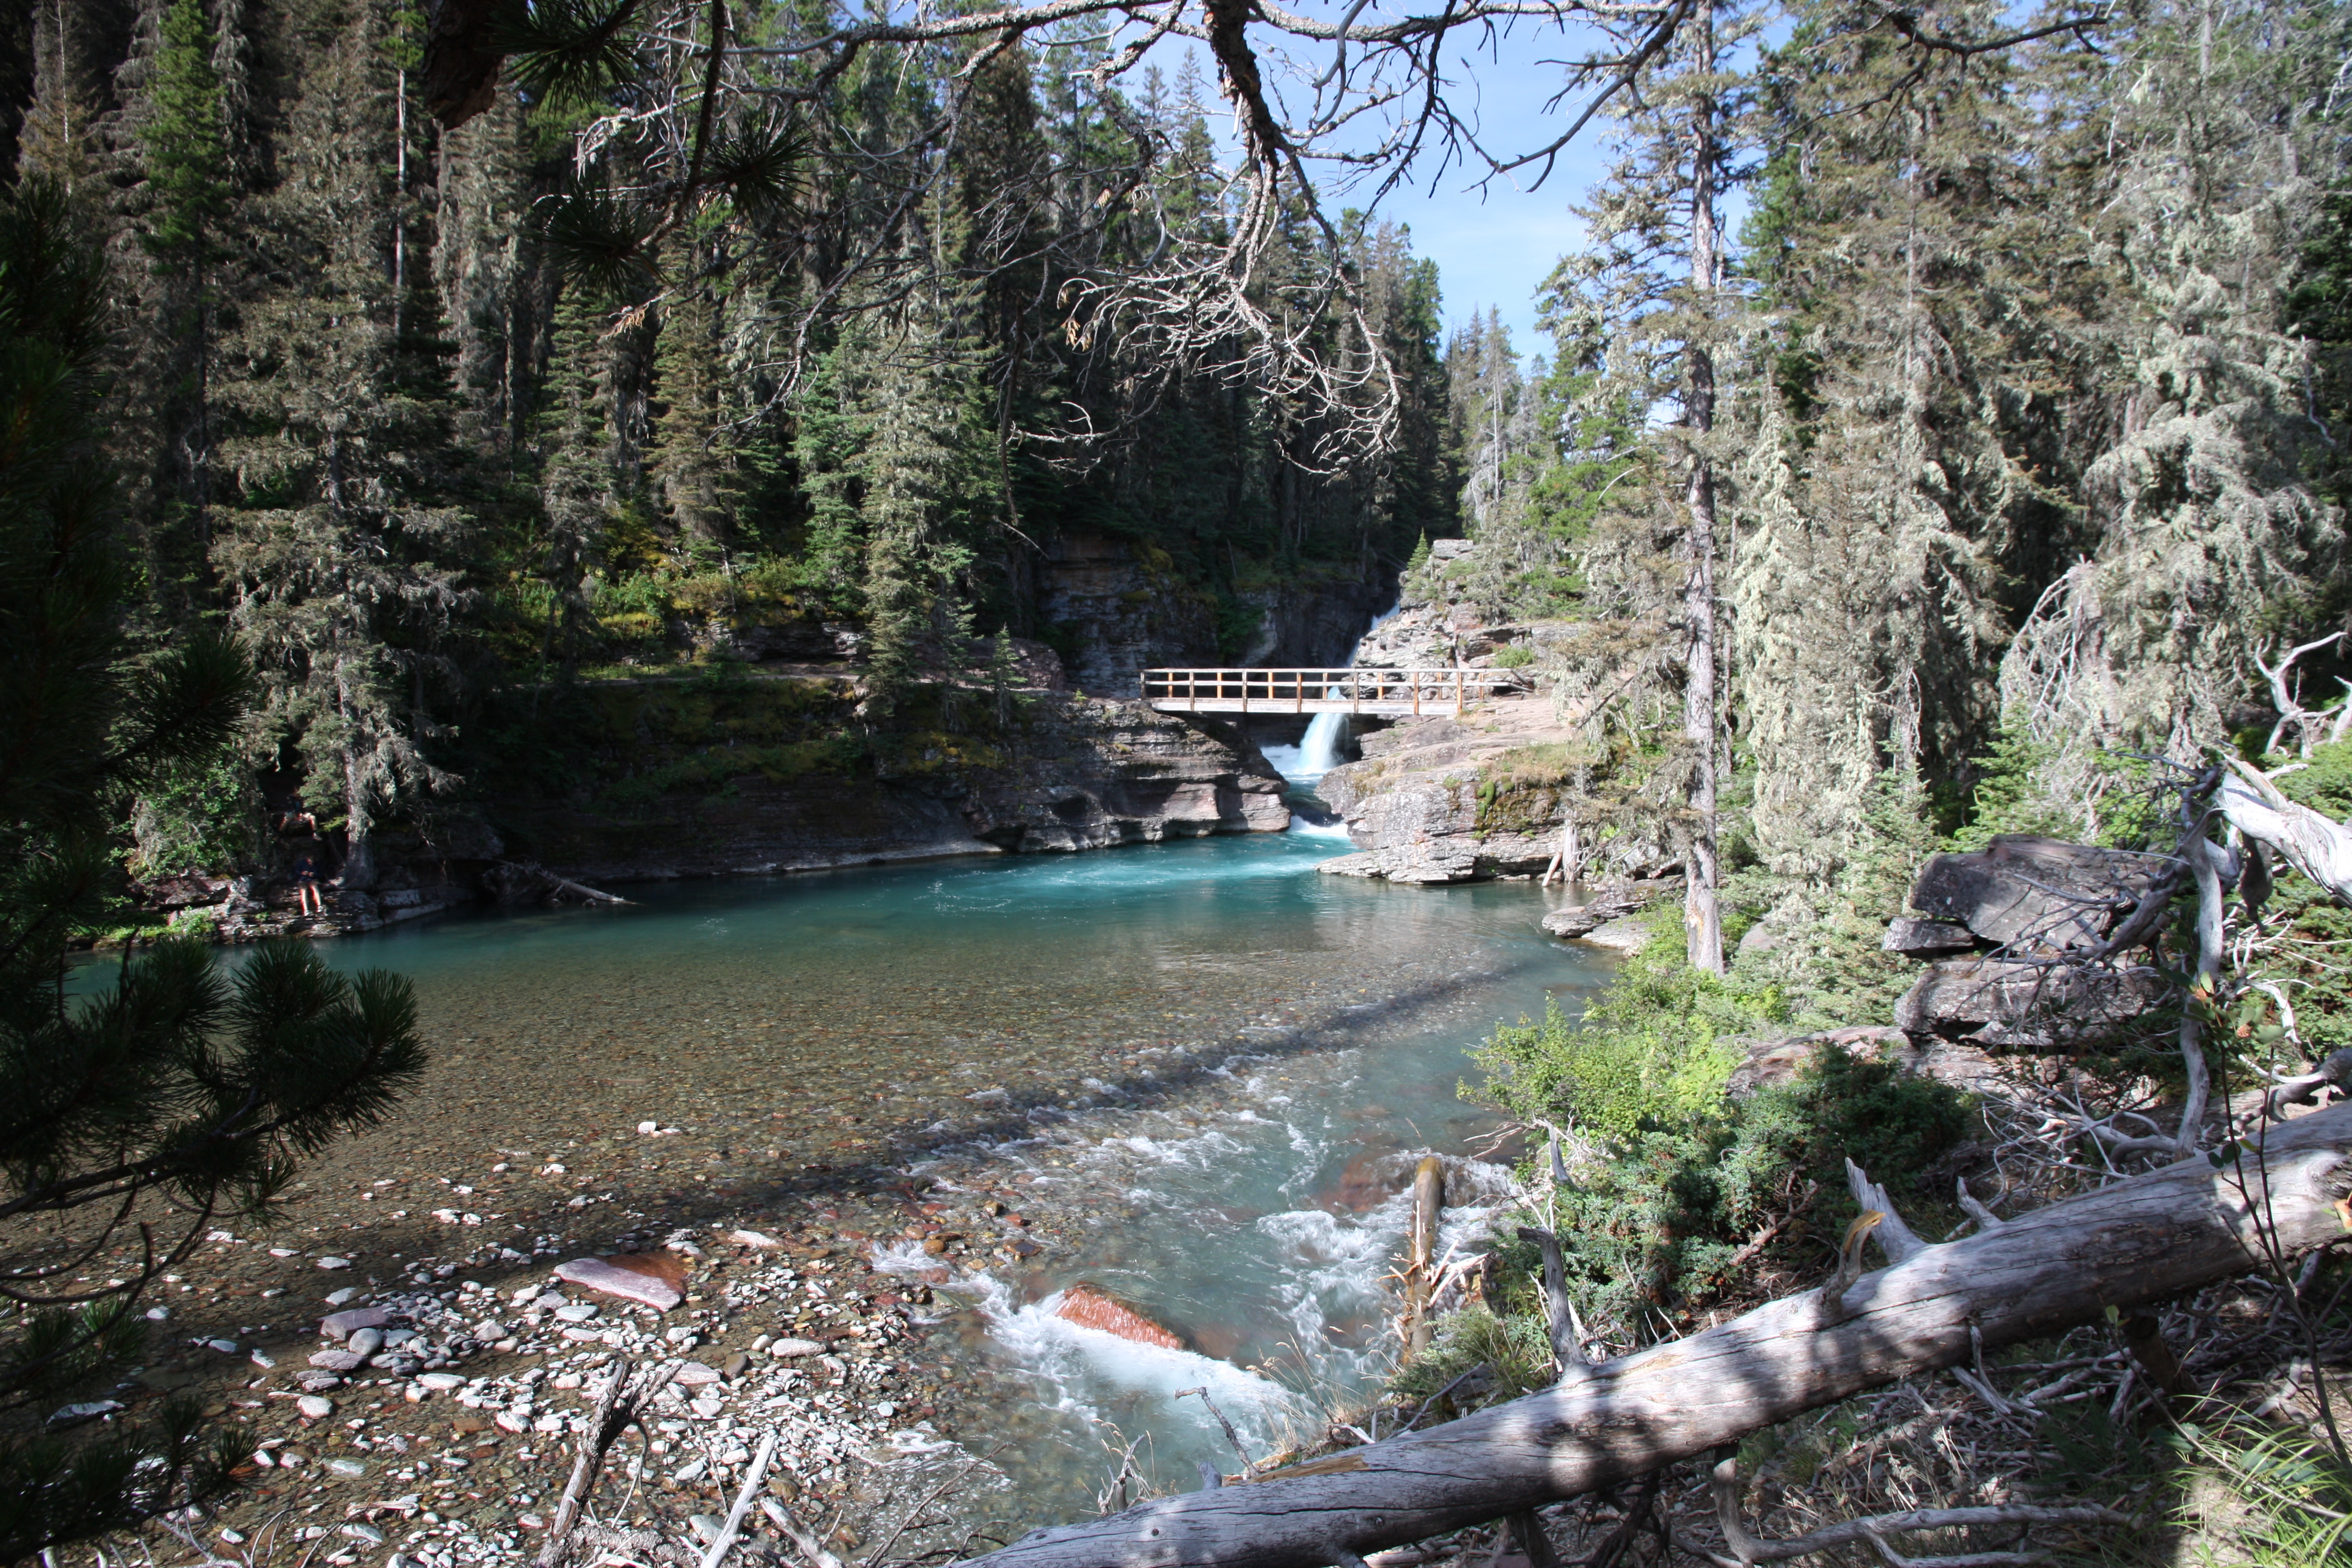
St. Mary Falls.

Posing in front of Virginia Falls.
Siyeh Bend to St. Mary Falls from the Siyeh Bend/Piegan Pass trailhead on Going-to-the-Sun Road just east of Logan Pass; 5.0 miles one-way with a return trip via the park shuttle. There is about a mile of uphill hiking at the beginning of this route, but then it is all downhill except a brief, easy climb to the St. Mary Falls trailhead and shuttle stop at the end.

Todd the Hiker at the Siyeh Bend trailhead. (Photo credit: Leah Nystrom)
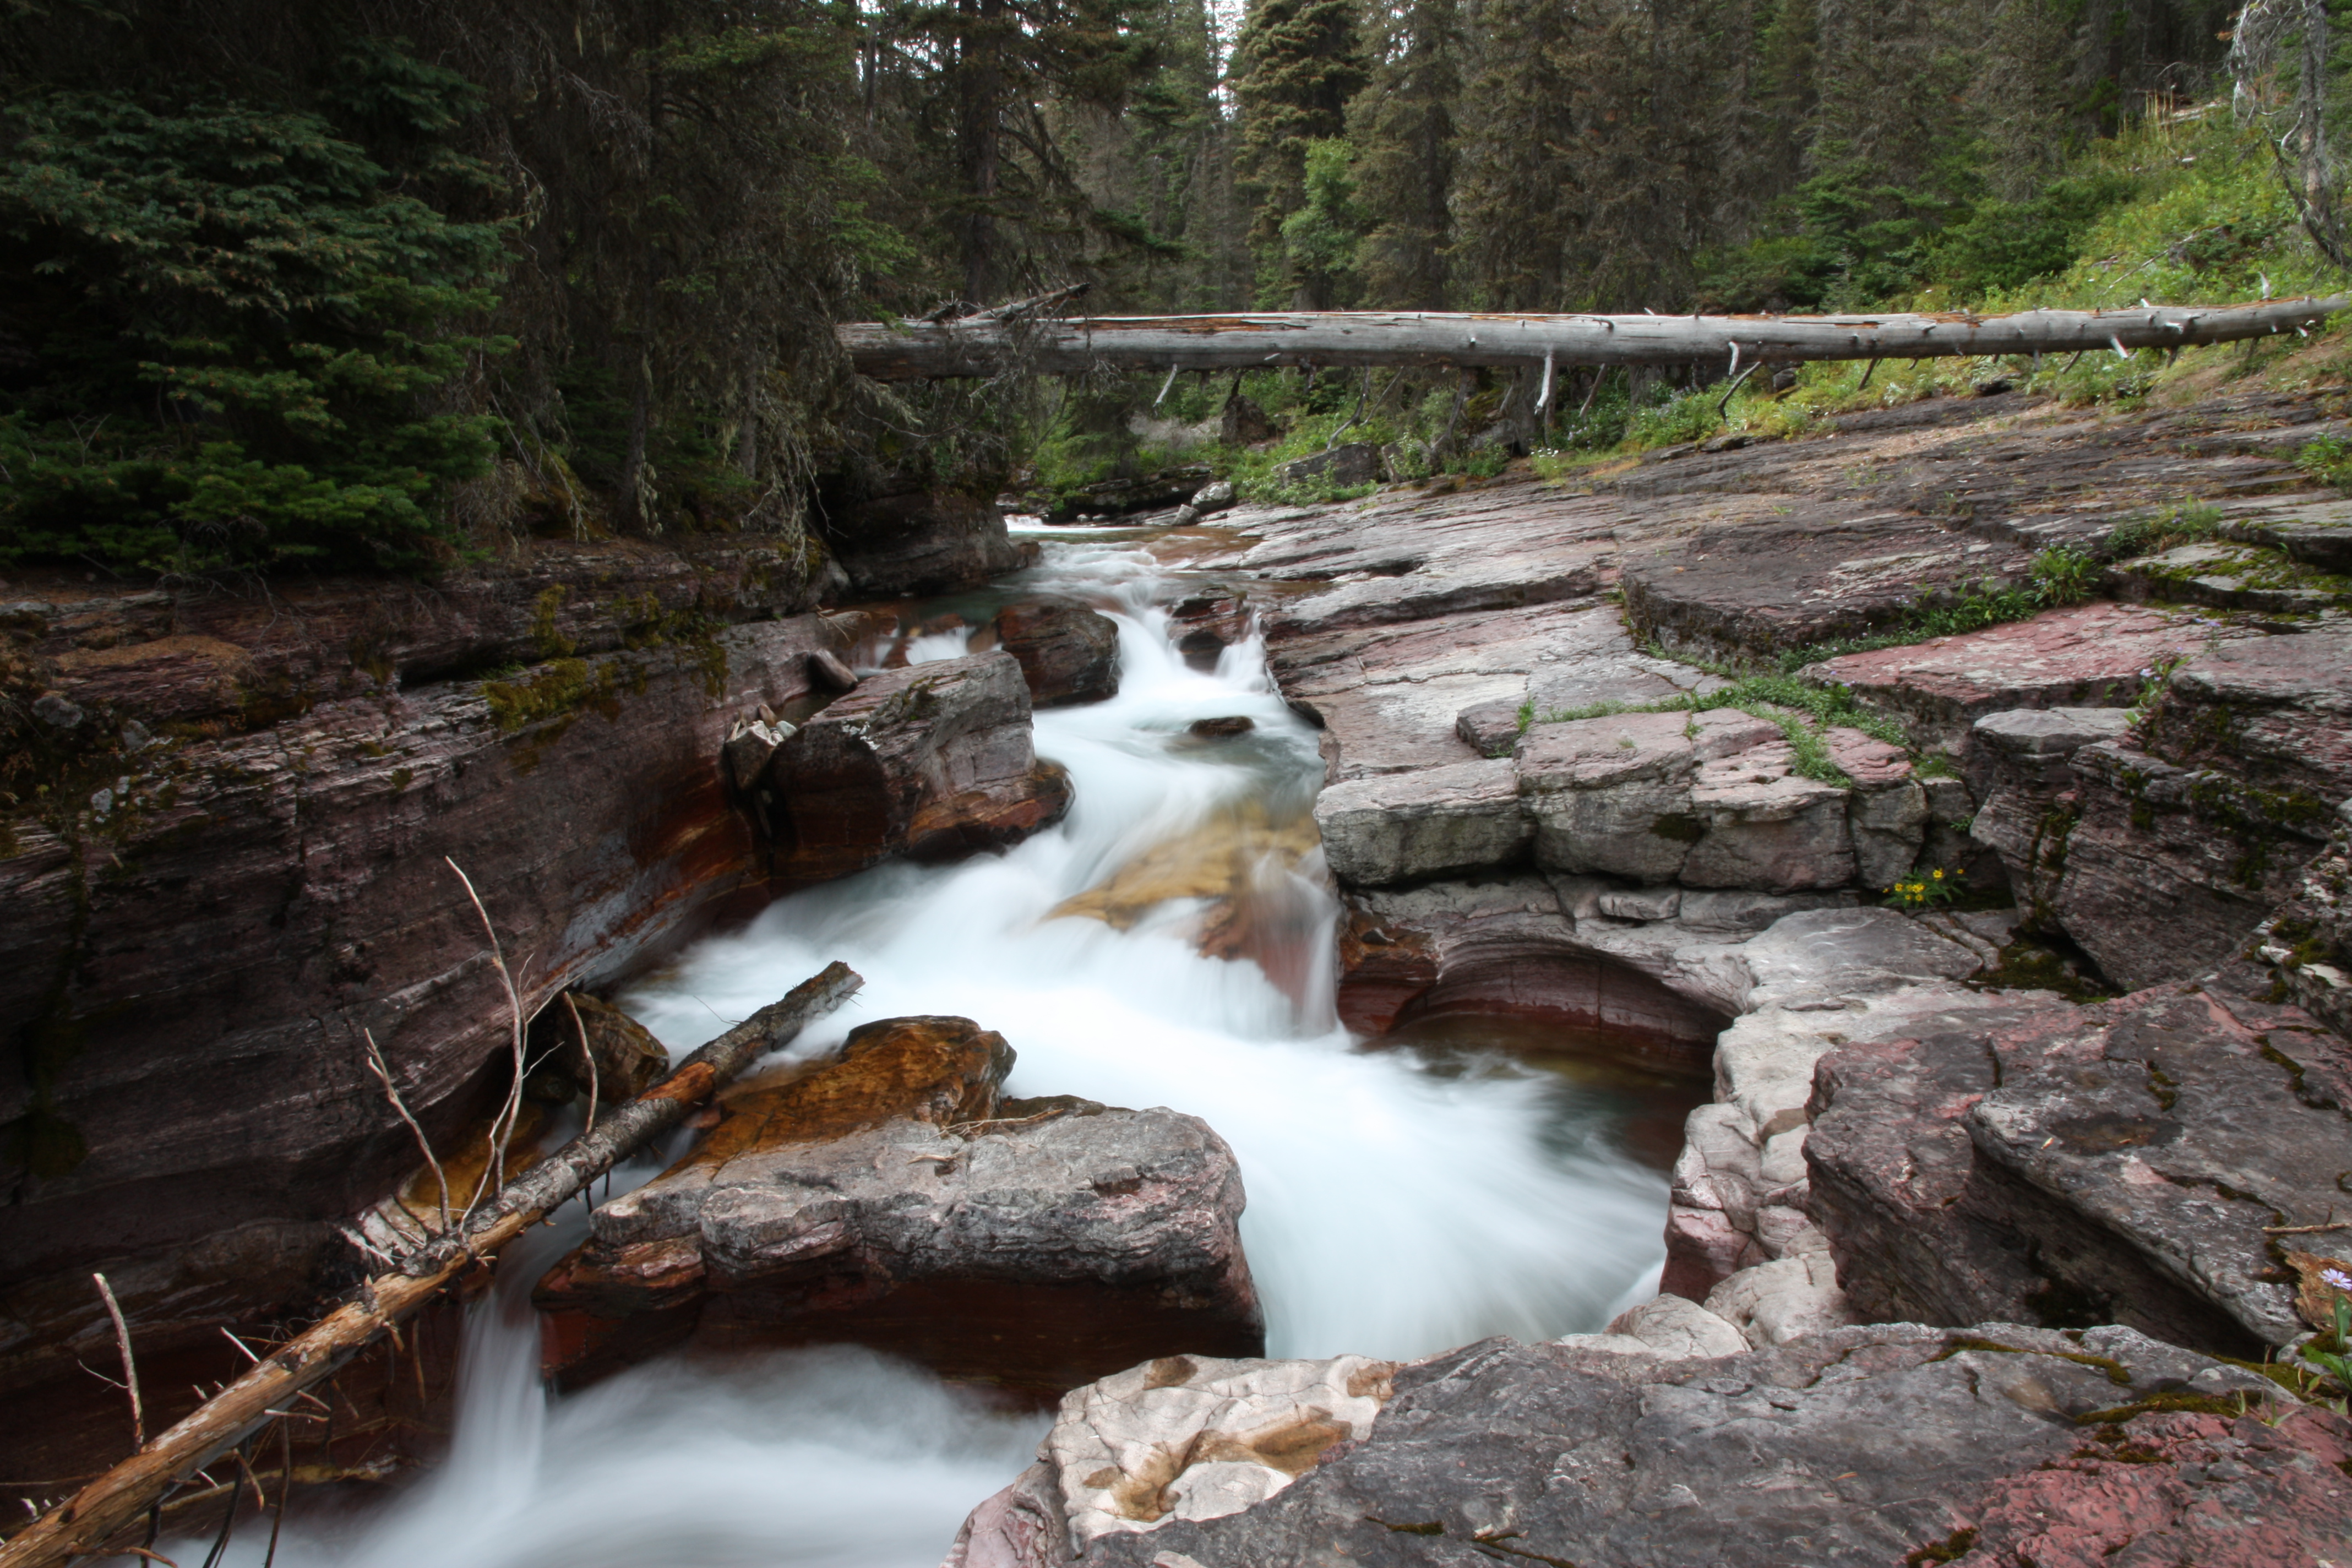
Deadwood Falls on Reynolds Creek in the St. Mary Valley.
Upper Two Medicine Lake from the Boat Landing on the west end of Two Medicine Lake; 4.6 miles out-and-back; this is a moderate uphill hike on the way to Upper Two Medicine Lake and downhill on the return. We chose to ride the boat out to the trailhead (for a fee); this is not required, though it is almost triple the distance if you choose to hike the whole route starting near the Two Medicine Visitor Center.
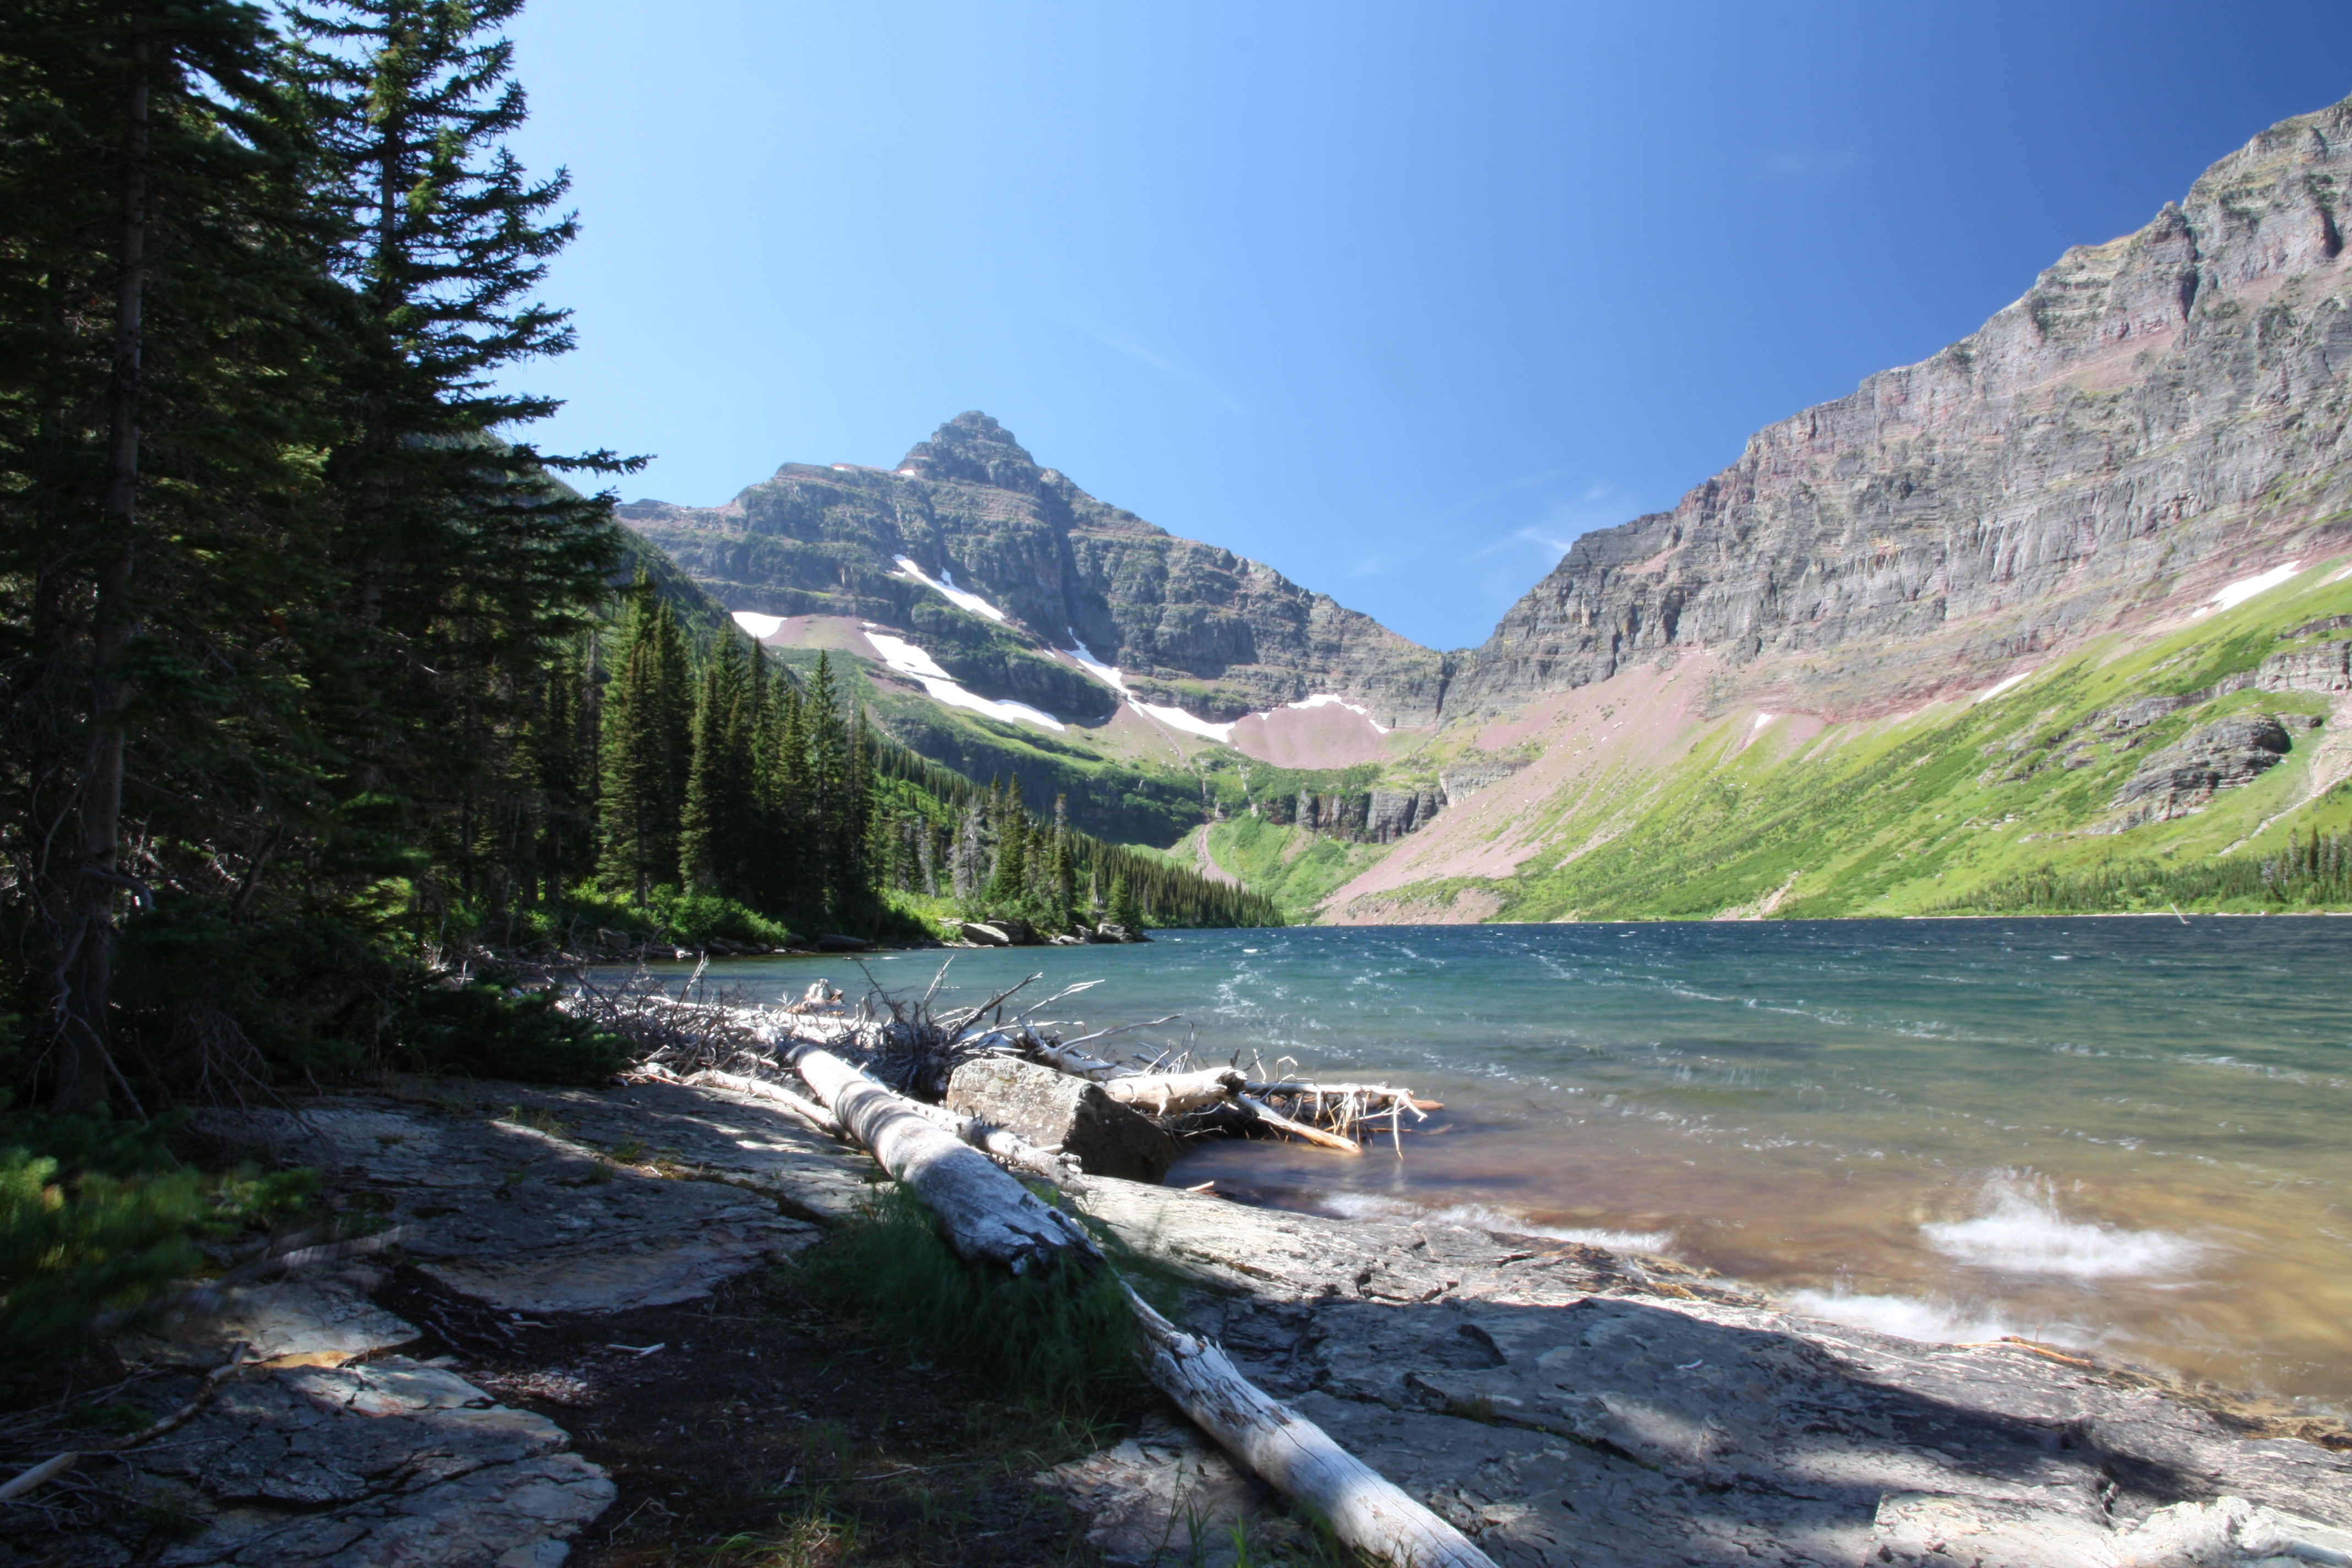
The windblown waters of Upper Two Medicine Lake.

I recommend a stop to see Running Eagle Falls on the way up to Two Medicine.
Iceberg Lake from the Many Glacier Visitor Center; 10 miles out-and-back; there is about a two thousand foot elevation gain on this hike, all uphill on the way out and all downhill on the way back. This is a tough hike so give yourself plenty of time, with margin built in to rest and take in the scenery at the top.

Beargrass and the incredible mountain views along the Iceberg Lake Trail.

Mountain meadow wildflowers with Iceberg Lake in the distance.
Grinnell Glacier from the Swiftcurrent trailhead (Many Glacier); 9.6 miles out-and-back; this is pretty much the same configuration as the Iceberg Lake hike, with about a two thousand foot elevation gain, all uphill on the way out and all downhill on the way back. This is another tough hike so, again, give yourself plenty of time to rest and take in the scenery at the top.
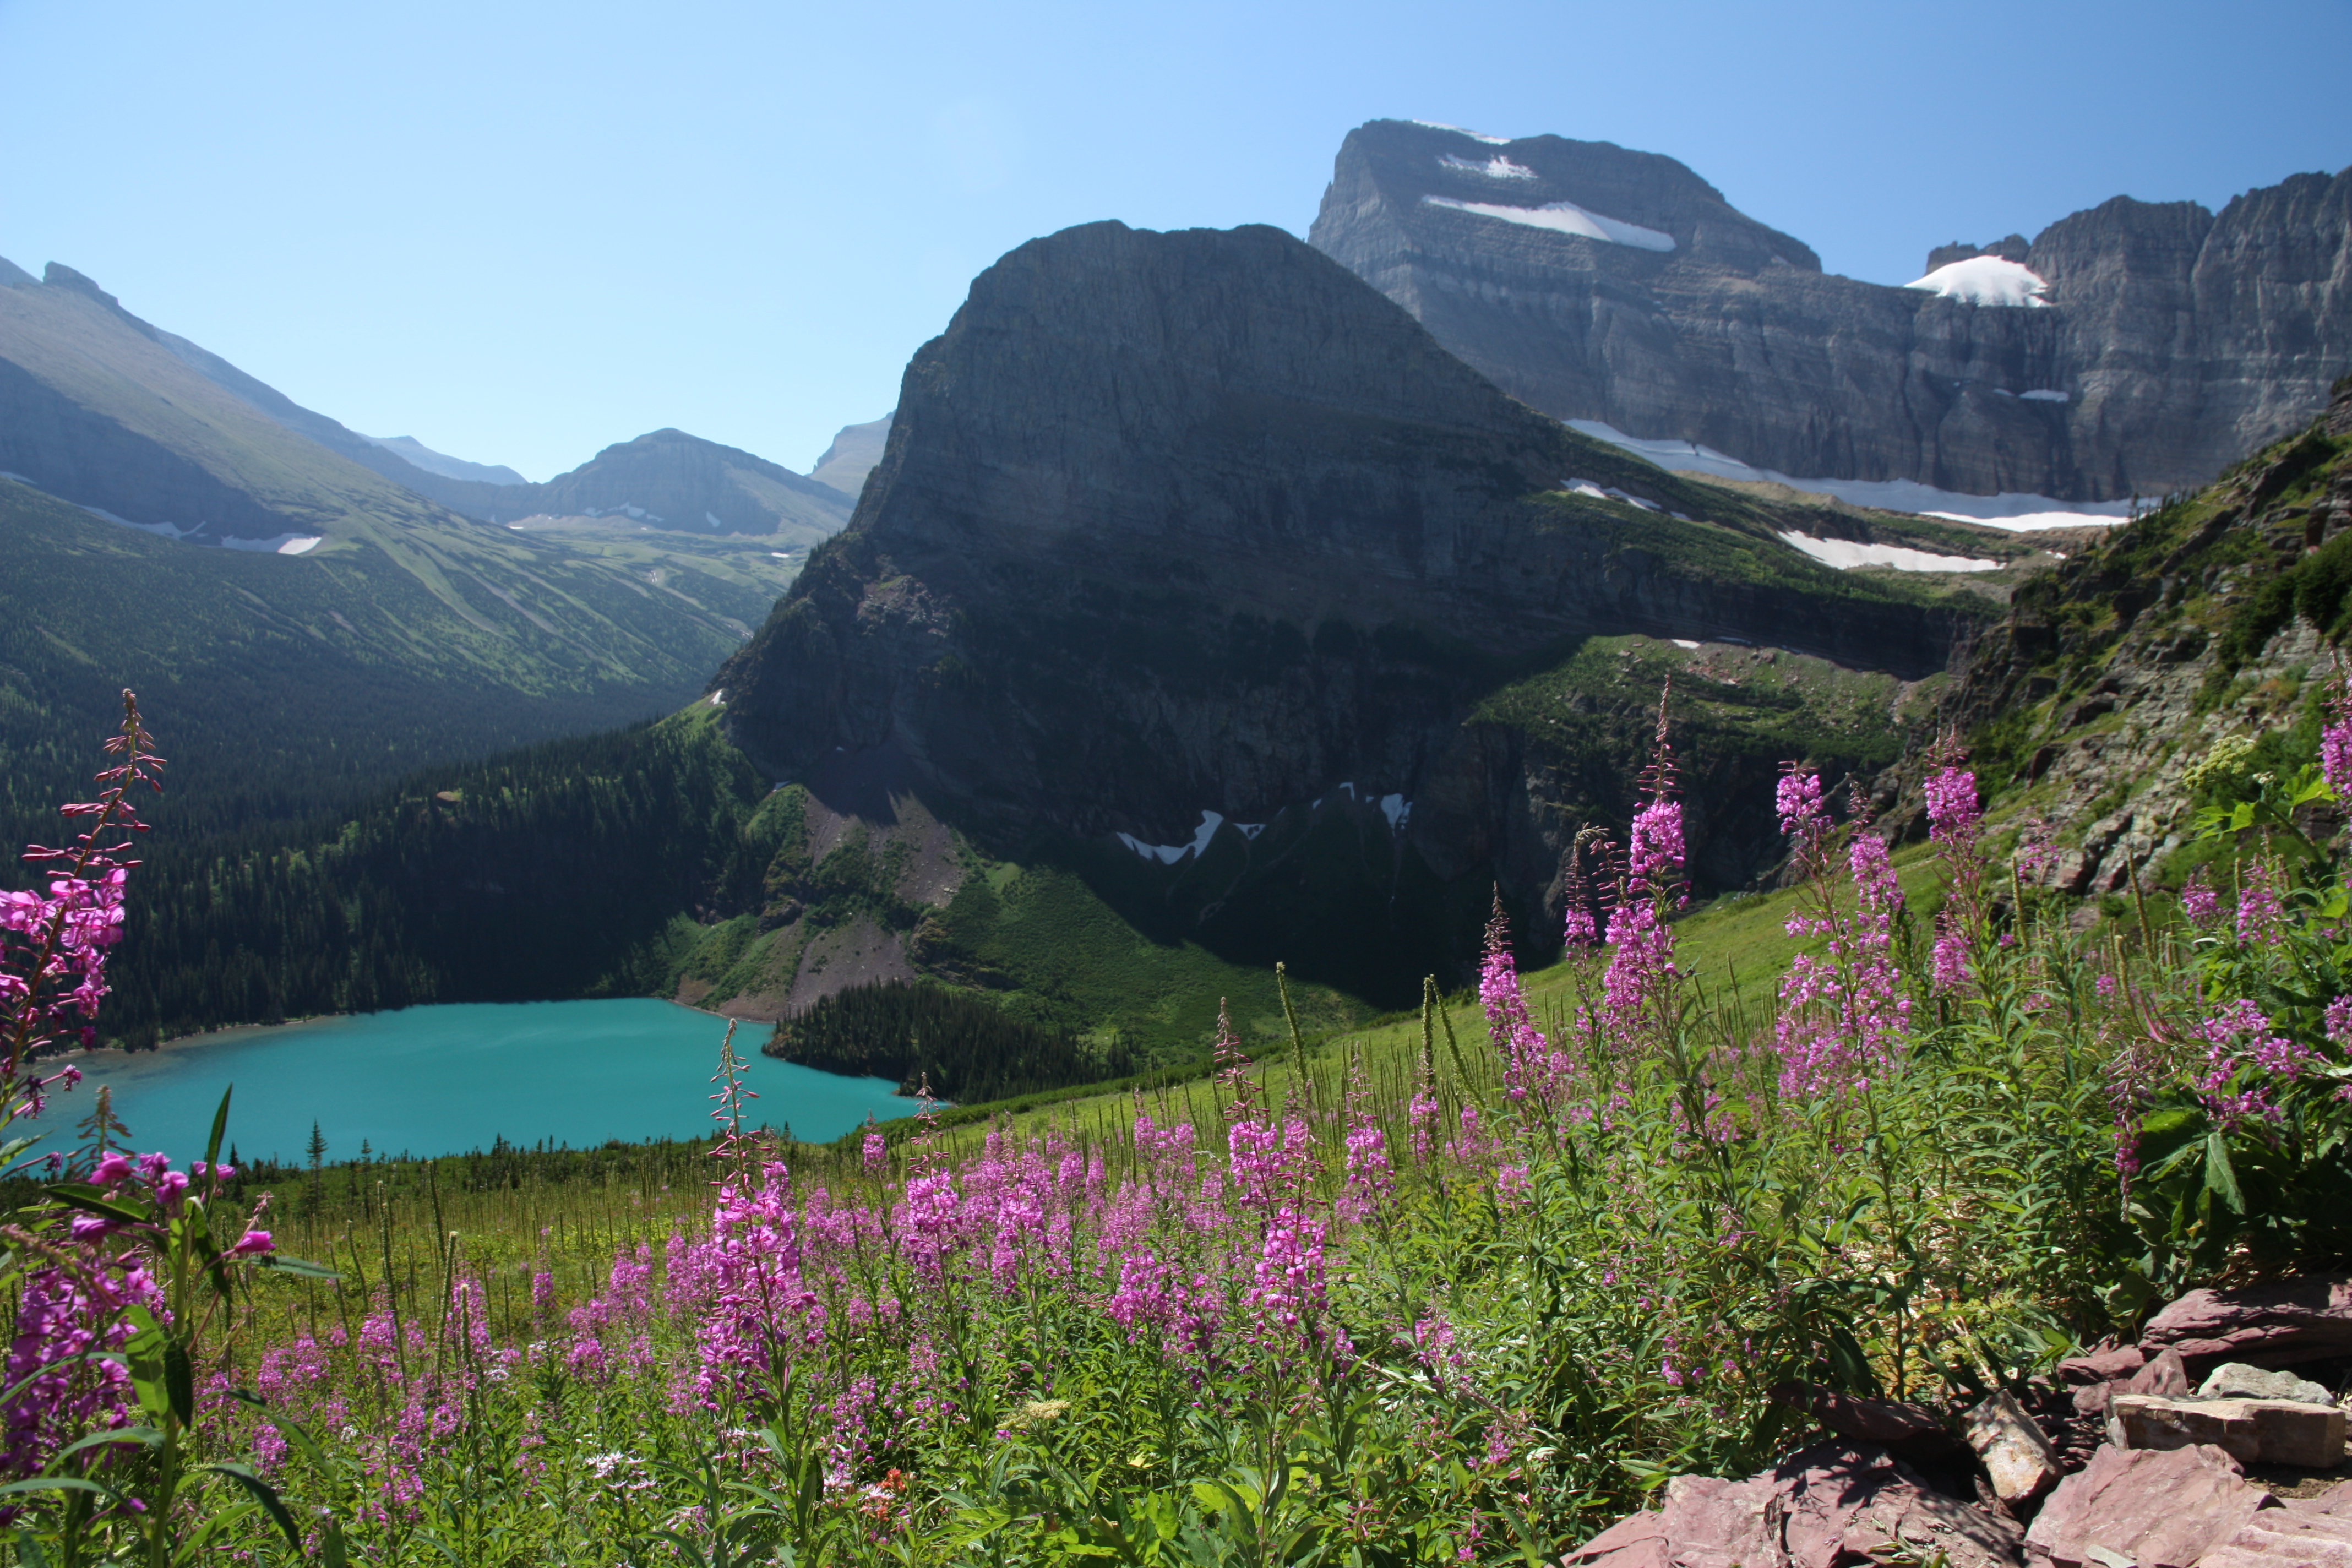
Fireweed accents the view overlooking the sparkling blue waters of Grinnell Lake.

Spectacular view from above Grinnell Glacier.
Hidden Lake Overlook from the Logan Pass Visitor Center; 2.6 miles out-and-back; this is a short and fairly easy hike, though it is all uphill on the way out and downhill on the way back.
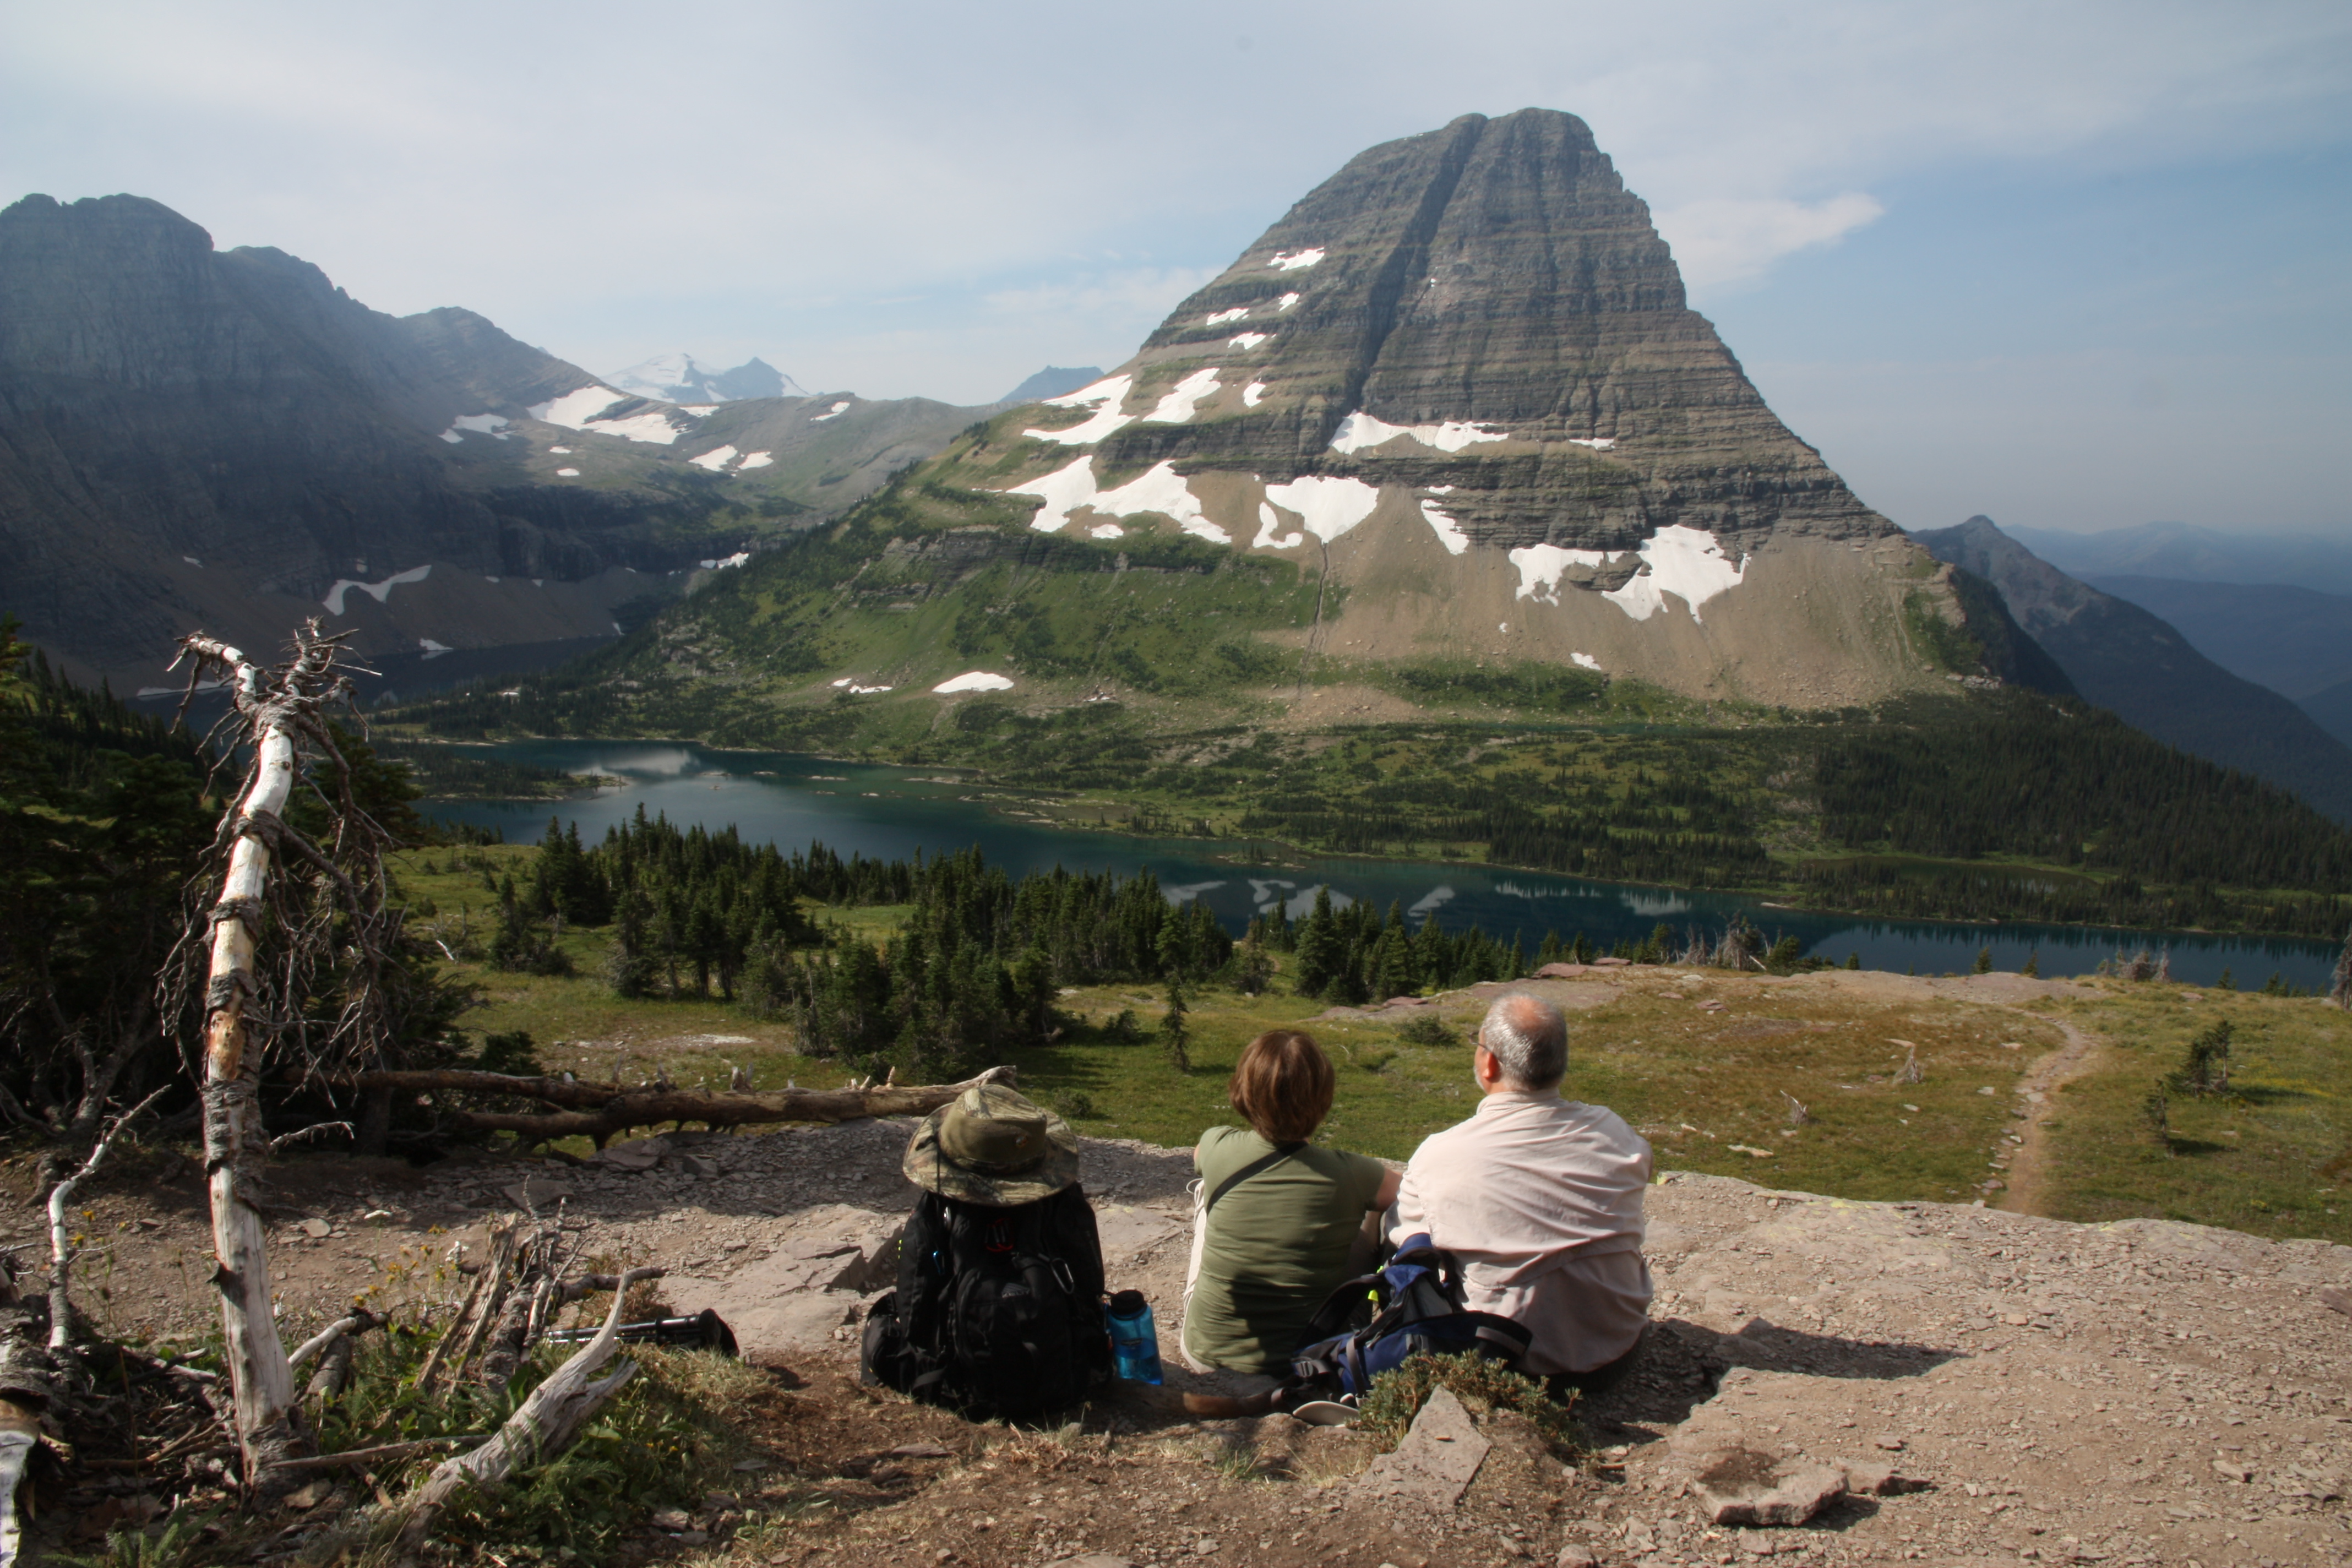
Enjoying the view from the Hidden Lake Overlook.
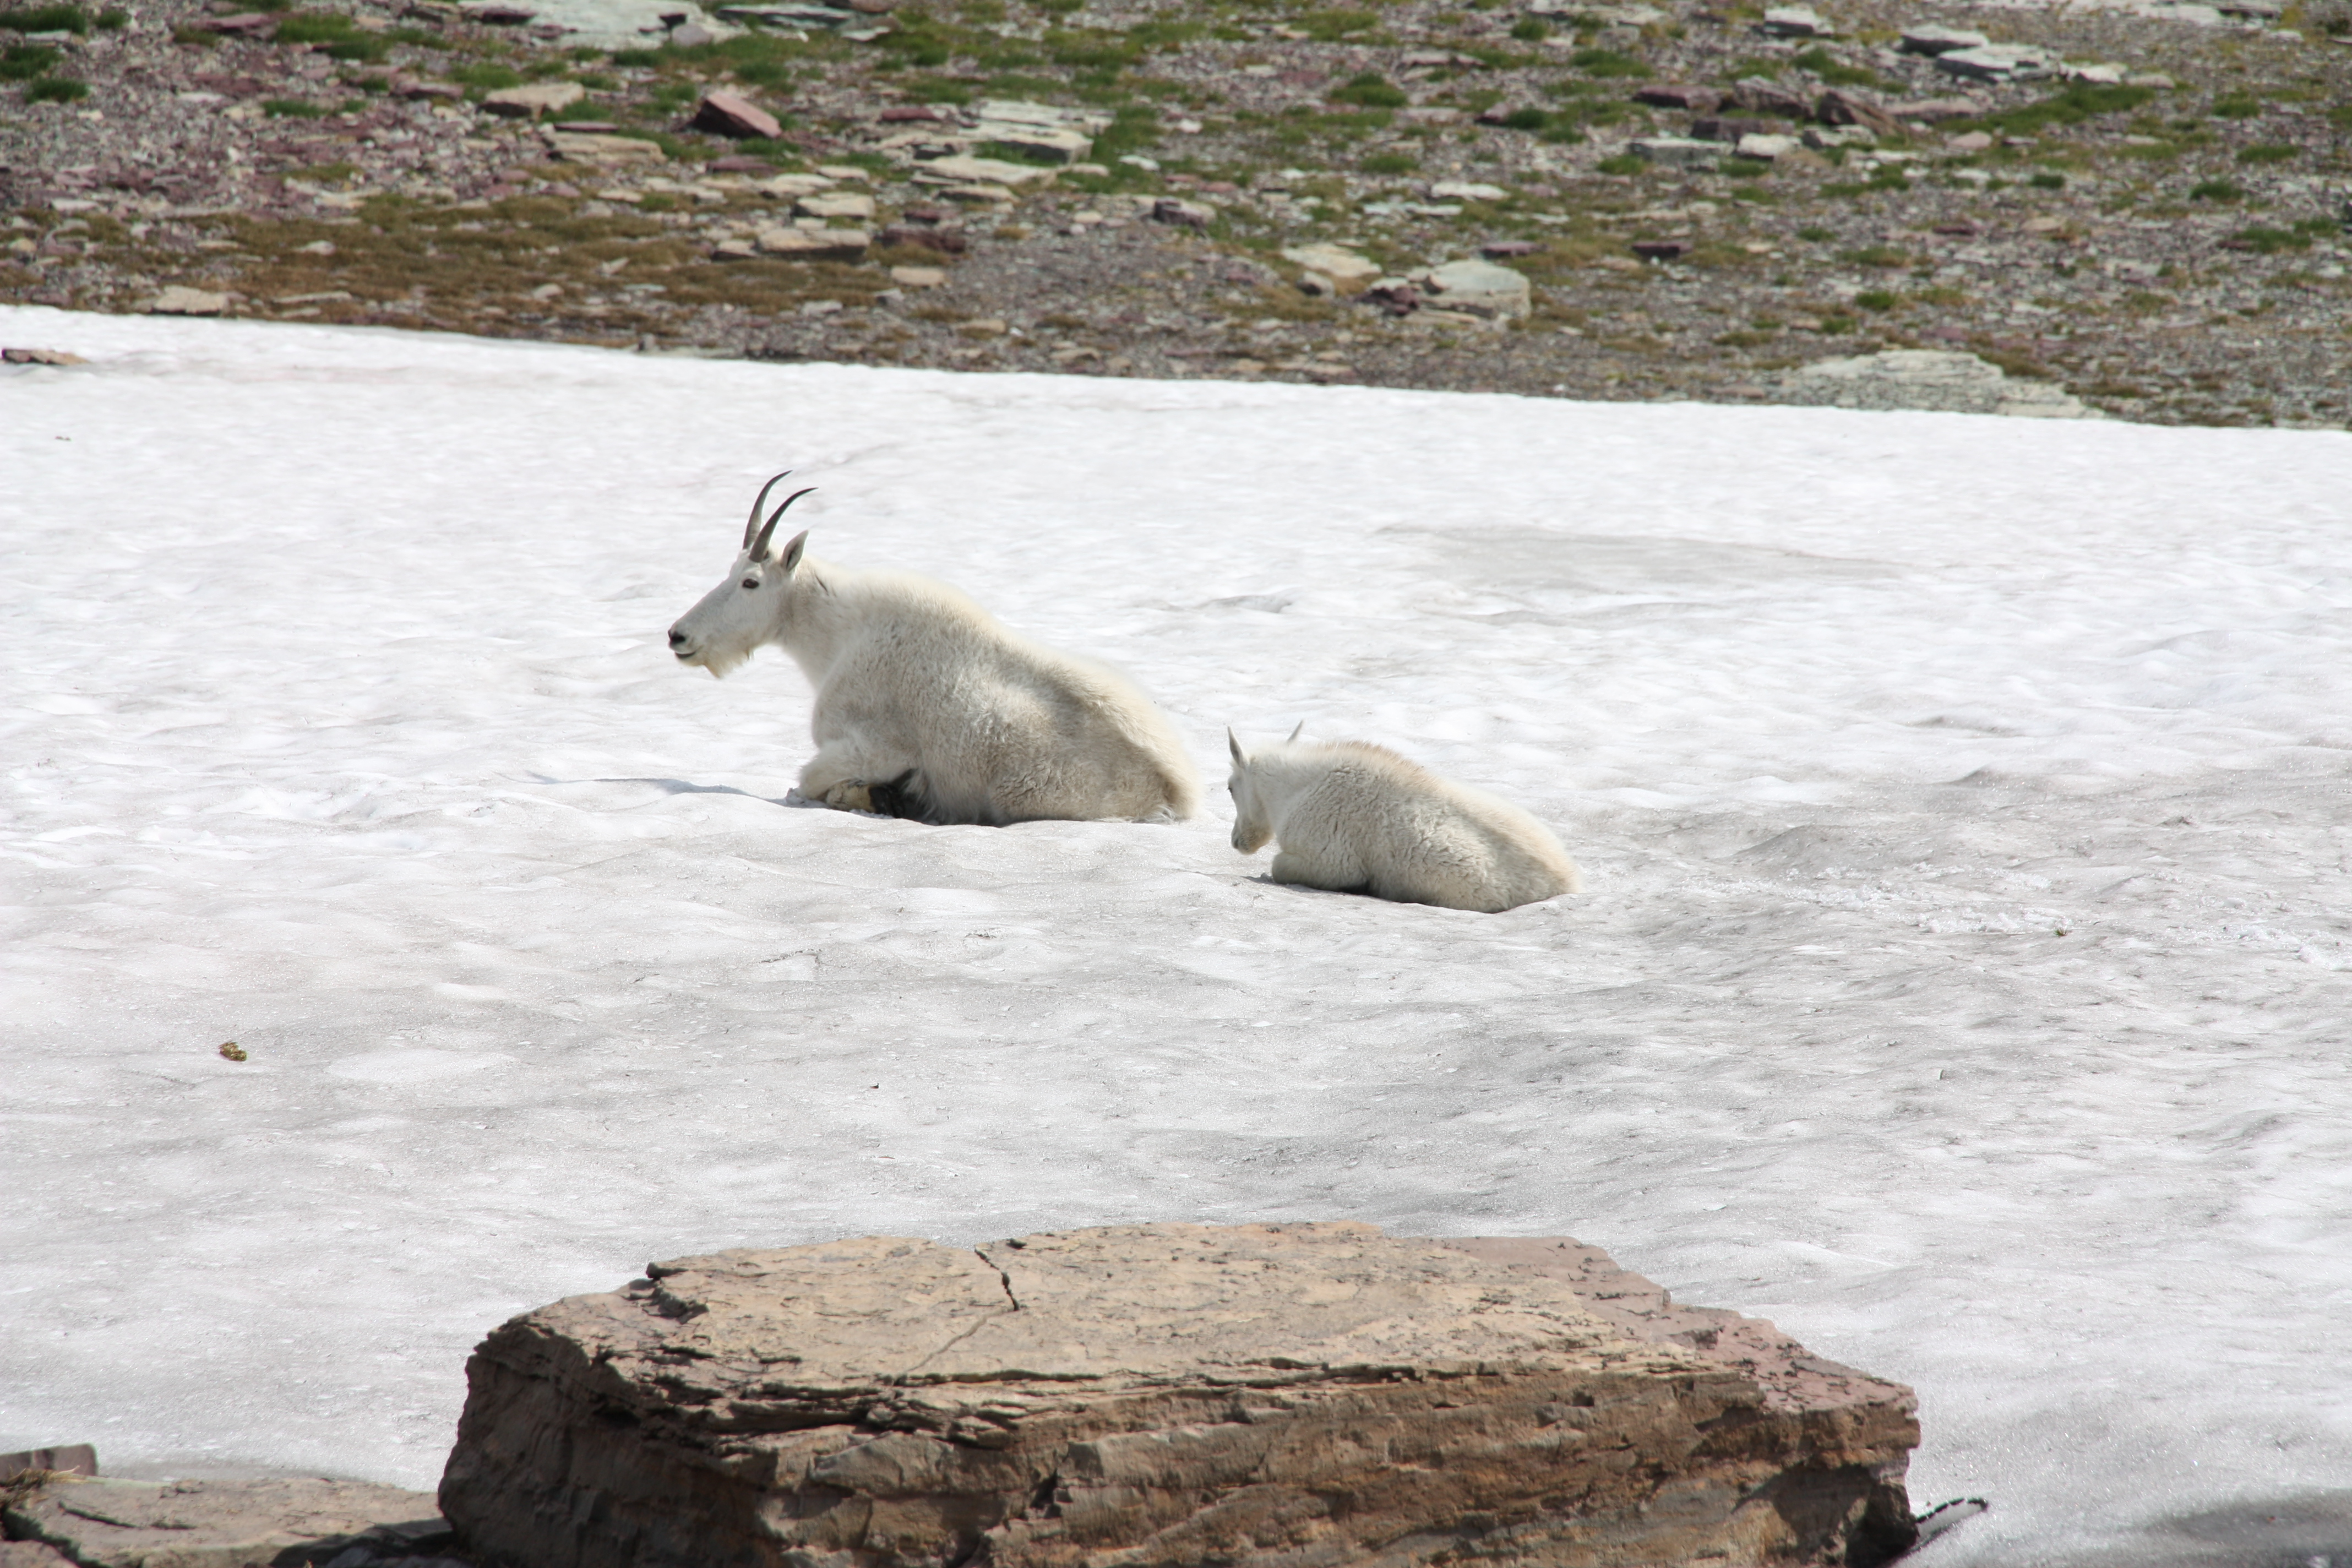
Mountain goats in the snow above the Logan Pass Visitor Center.
Our time in Glacier National Park was an amazing experience! The most difficult task I faced in writing this post was deciding which of the over 1000 photographs to include. I hope the ones I chose provide you with the inspiration to take a trip there yourself, you won’t regret it!
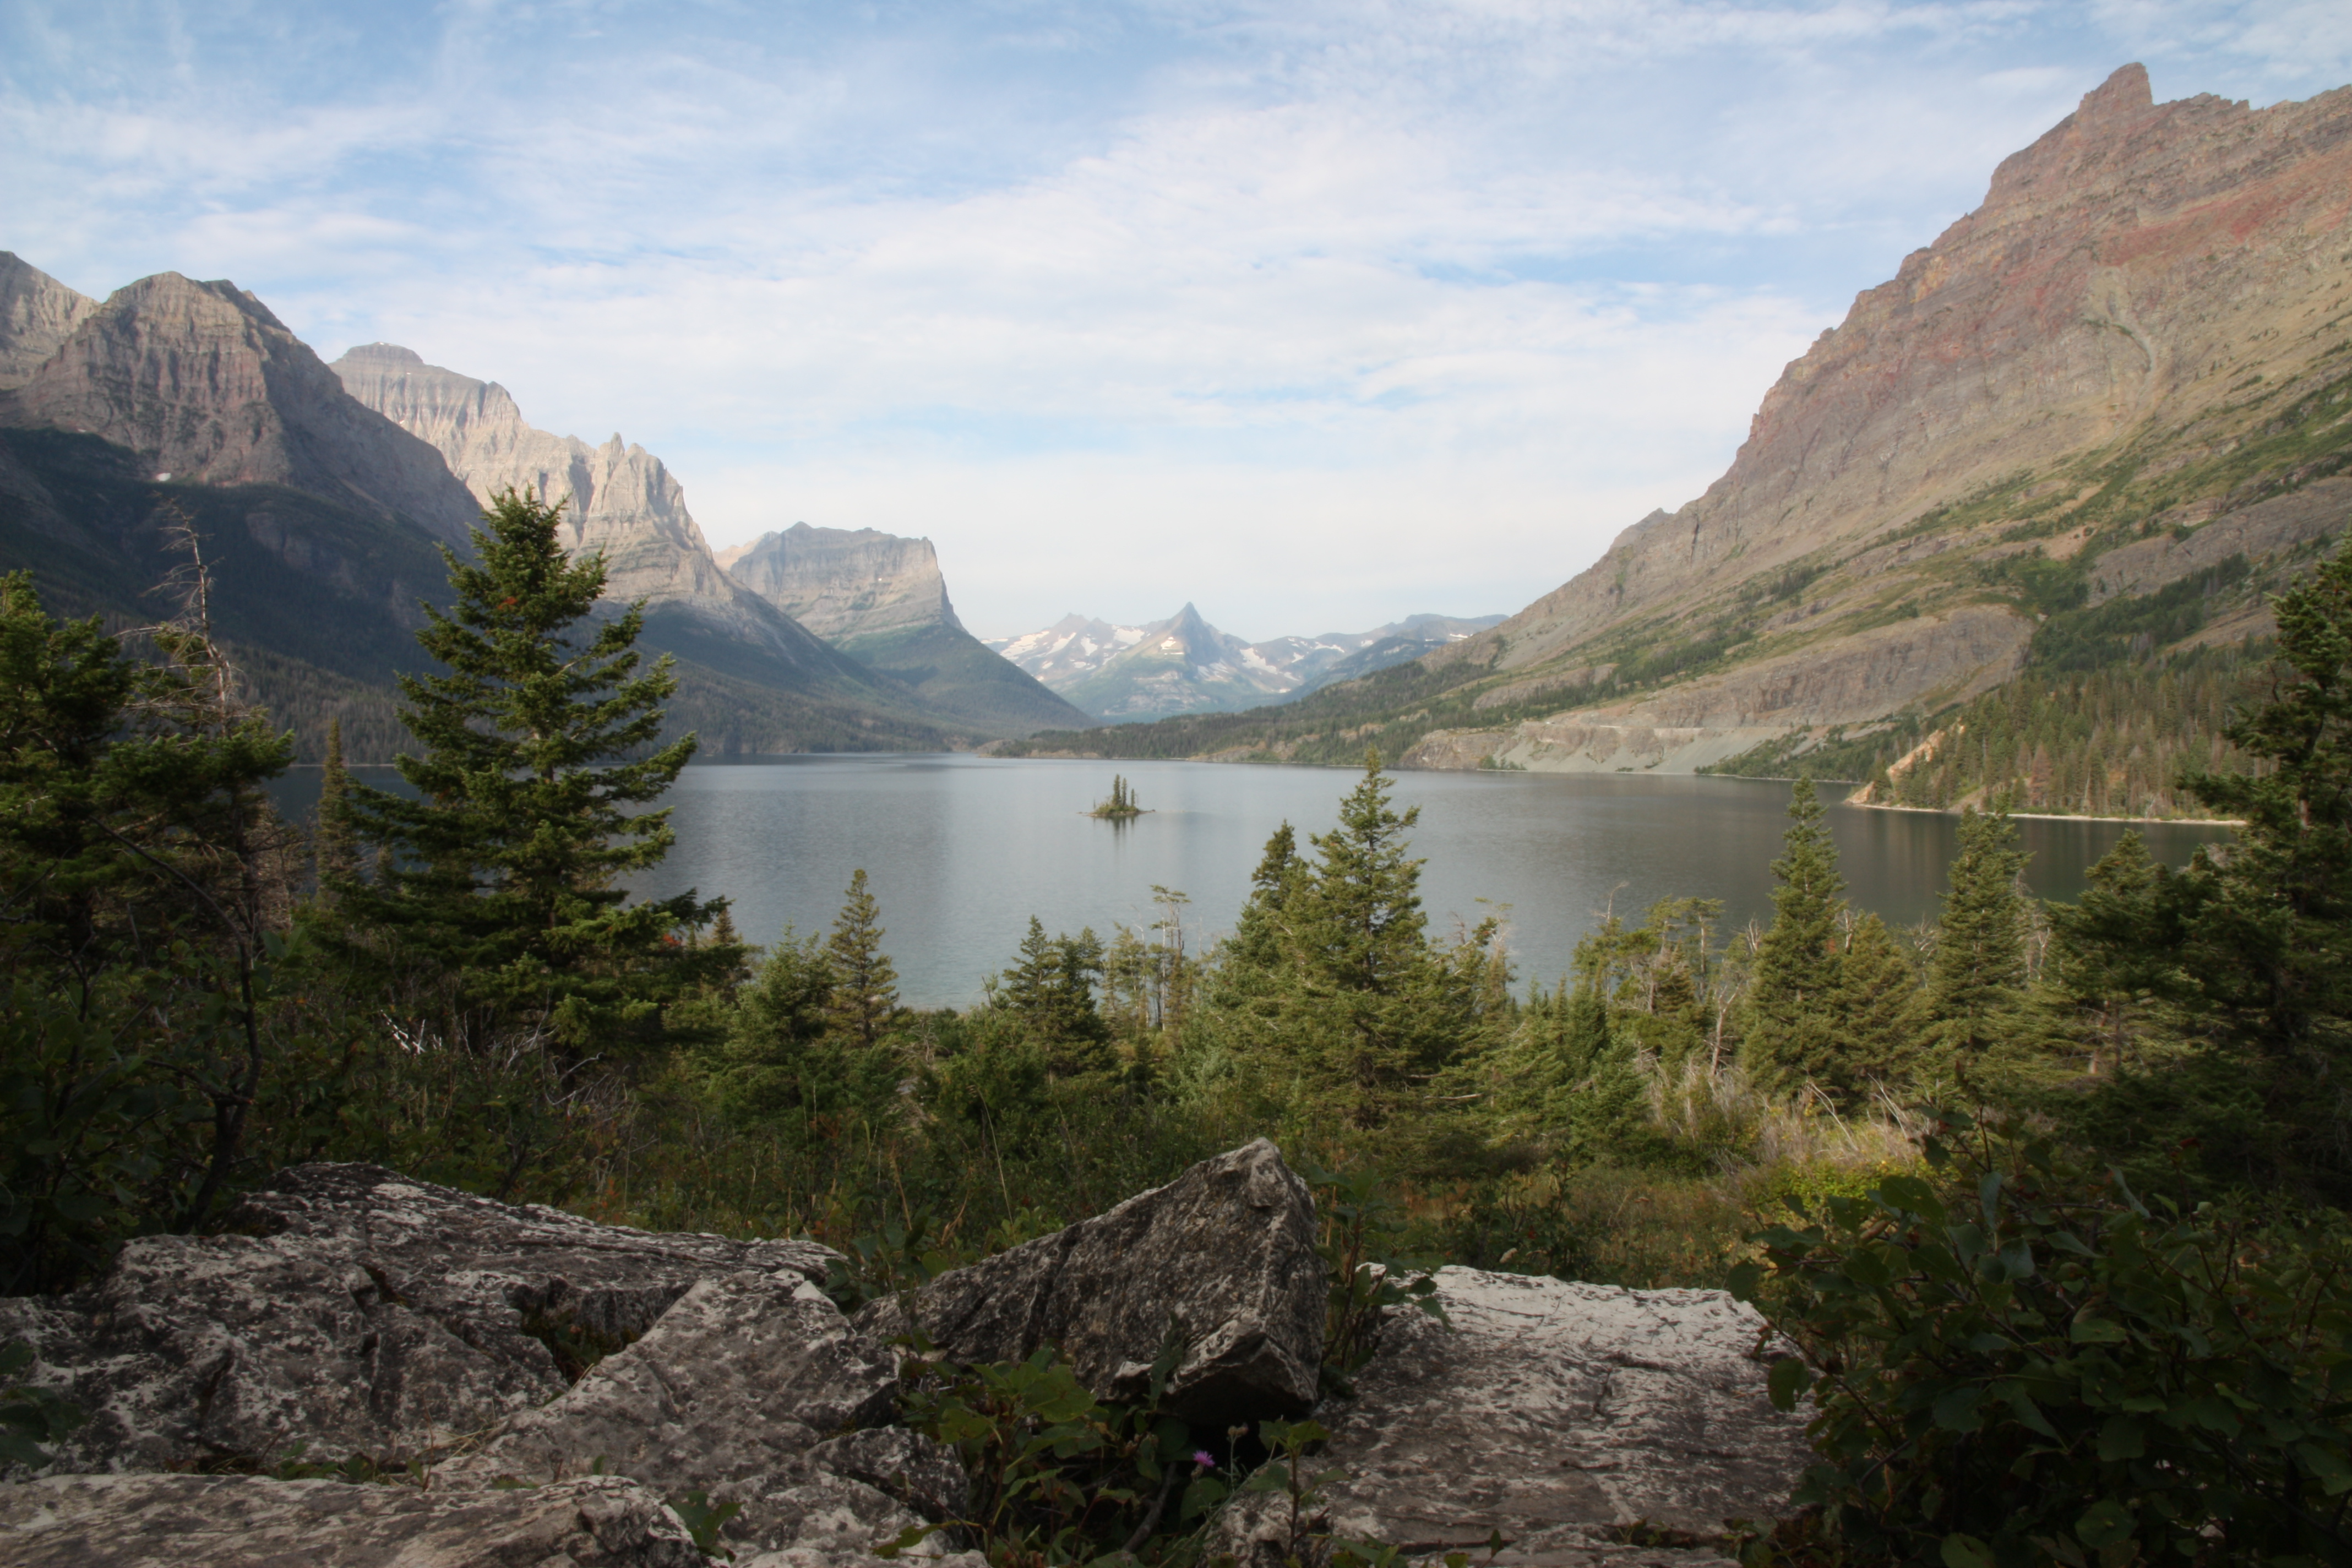
No visit to Glacier National Park would be complete without a stop to snap a shot of the iconic St. Mary Lake and Wild Goose Island from the scenic overlook along Going-to-the-Sun Road.
© Todd D. Nystrom and Todd the Hiker, 2015-2020.
